scurvy
Good Ol' Boy
How to Change a Front Wheel Bearing on a MkIV A-Platform VW in Eleven Million Easy Steps.
UPDATE JANUARY 2018: Fixed the pictures?
HOLY CRAP GUYS! I finally put together a video showing the noise from a bad wheel bearing and some of the other updates what have transpired in this thread over the past hojillion years. Take a look and lemme know what you think.
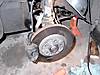
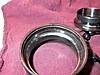
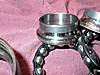
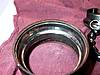
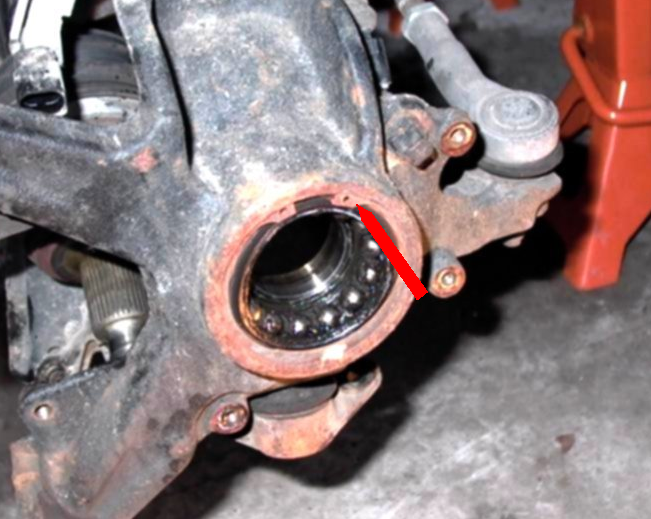
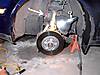
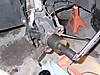
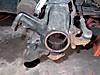
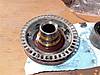
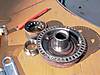
I took these pictures to illustrate the process of removal & replacement of a bad front wheel bearing in my 2006 Golf GLS TDI, as I was sick and tired of the constant noise. Mine was worst at about 35 - 40 mph, which is right about normal city speed for me. Man, that was annoying.
I've also seen writeups that require $500 specialized pullers. I intended this to be cheaper to do for the occasional home mechanic. You can get everything you need to do this for about $100 if you had to buy it all from scratch. Another $50 for supplies and a wheel bearing kit and it's still only half the cost of having a stealership do it for you.
Step 0: Diagnosis.
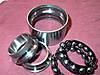
Once you've heard the "whrowhrowhrowhrowhrowhrow" groan of a bad wheel bearing, you'll never forget it. But if you've never heard it, it usually manifests itself as a deep groaning noise that increases tempo with speed. It sounds very similar to a square tire. It will often go away when turning right or left. This is usually the way to diagnose which front bearing is bad - conventional wisdom is that if the noise goes away when you turn left (and thereby load the driver's side bearing and unload the passenger side bearing), then it is the passenger side bearing that is bad. This is often wrong and is almost always dumb! DUMB AS HELL. MkIV VWs have double-row angular contact bearings, so when you turn one way you unload one set of bearings and load the other set in the same bearing shell.
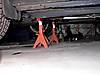
To be certain which one is bad, put the front end of the car up on jackstands. Put parking brake on. With car idling, put it in 5th gear and let the clutch out. The side with the bad bearing should be making that gawdawful racket. Disclaimer: this is dangerous. Don't get near the spinning wheels. Use good jackstands. Don't be stupid.
Tools:
Harbor Freight front wheel drive bearing removal kit, item 45210 EDIT: apparently superseded by item 66829 (although both appear on their 'new' website - check what your local store has in stock).
Big sockets to run the bearing removal kit - six point 28mm & 32mm (EDIT: MOGolf says a 27mm socket fits better on his. 28mm is quite snug on mine so check your own set before you start).
An impact gun really helps - I have a 110VAC electric one.
The longest breaker bar you can find that fits your big sockets. Two if you don't have an impact wrench.
30mm 12-point socket.
7mm hex key or allen wrench or hex wrench or allen key. Whatever you call it, it isn't a "standard" size in most hex sets.
Grease. I used Valvoline Synpower synthetic grease.
Beefy snap ring pliers.
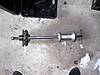
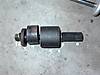
A big 3-jaw puller.
A 5 pound slide hammer. Rent this from AutoZone - OEM 27033.
Some manner of Dremel-type rotary tool with a billion cutoff wheels. Seriously, more is always better than not enough.
Big hammer & cold chisel.
The usual assortment of hand tools, sockets, penetrating oil & beer.
Like most things that don't get "maintenance", this is divided up into four segments: Get to the bearing; Remove the old bearing; Put the new bearing in & put the stuff back together.
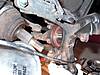
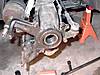
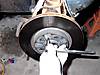
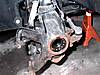
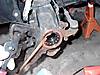
Part A: GET TO DA BEARING
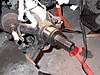
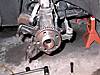
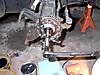
Part B: Pull my strings.
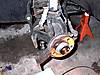
Part C: P-p-p-push it! Push it real good!
Part D: I likes to torque-it, torque-it.
More information and pictures to follow.
UPDATE JANUARY 2018: Fixed the pictures?
HOLY CRAP GUYS! I finally put together a video showing the noise from a bad wheel bearing and some of the other updates what have transpired in this thread over the past hojillion years. Take a look and lemme know what you think.
I took these pictures to illustrate the process of removal & replacement of a bad front wheel bearing in my 2006 Golf GLS TDI, as I was sick and tired of the constant noise. Mine was worst at about 35 - 40 mph, which is right about normal city speed for me. Man, that was annoying.
I've also seen writeups that require $500 specialized pullers. I intended this to be cheaper to do for the occasional home mechanic. You can get everything you need to do this for about $100 if you had to buy it all from scratch. Another $50 for supplies and a wheel bearing kit and it's still only half the cost of having a stealership do it for you.
Step 0: Diagnosis.
Once you've heard the "whrowhrowhrowhrowhrowhrow" groan of a bad wheel bearing, you'll never forget it. But if you've never heard it, it usually manifests itself as a deep groaning noise that increases tempo with speed. It sounds very similar to a square tire. It will often go away when turning right or left. This is usually the way to diagnose which front bearing is bad - conventional wisdom is that if the noise goes away when you turn left (and thereby load the driver's side bearing and unload the passenger side bearing), then it is the passenger side bearing that is bad. This is often wrong and is almost always dumb! DUMB AS HELL. MkIV VWs have double-row angular contact bearings, so when you turn one way you unload one set of bearings and load the other set in the same bearing shell.
To be certain which one is bad, put the front end of the car up on jackstands. Put parking brake on. With car idling, put it in 5th gear and let the clutch out. The side with the bad bearing should be making that gawdawful racket. Disclaimer: this is dangerous. Don't get near the spinning wheels. Use good jackstands. Don't be stupid.
Tools:
Harbor Freight front wheel drive bearing removal kit, item 45210 EDIT: apparently superseded by item 66829 (although both appear on their 'new' website - check what your local store has in stock).
Big sockets to run the bearing removal kit - six point 28mm & 32mm (EDIT: MOGolf says a 27mm socket fits better on his. 28mm is quite snug on mine so check your own set before you start).
An impact gun really helps - I have a 110VAC electric one.
The longest breaker bar you can find that fits your big sockets. Two if you don't have an impact wrench.
30mm 12-point socket.
7mm hex key or allen wrench or hex wrench or allen key. Whatever you call it, it isn't a "standard" size in most hex sets.
Grease. I used Valvoline Synpower synthetic grease.
Beefy snap ring pliers.
A big 3-jaw puller.
A 5 pound slide hammer. Rent this from AutoZone - OEM 27033.
Some manner of Dremel-type rotary tool with a billion cutoff wheels. Seriously, more is always better than not enough.
Big hammer & cold chisel.
The usual assortment of hand tools, sockets, penetrating oil & beer.
Like most things that don't get "maintenance", this is divided up into four segments: Get to the bearing; Remove the old bearing; Put the new bearing in & put the stuff back together.
Part A: GET TO DA BEARING
Part B: Pull my strings.
Part C: P-p-p-push it! Push it real good!
Part D: I likes to torque-it, torque-it.
More information and pictures to follow.
Last edited:
")