My Smyth-Utes build thread

Powder Hound

Top Post Dawg
Joined
Oct 25, 1999
Location
Under a Bridge, Crestview, FL, USA
TDI
'00 Golf 4dr White 5sp, '02 Jettachero 5sp, Wife's '03 NB Platinum Gray auto(!)
Got the shift boot placed yesterday. Today I checked the parking brakes. They work perfectly. Not dragging at all when they're released. I guess I was just assuming the worst when it didn't seem to work the way I wanted at first.

The headliner is giving up entirely. I haven't ripped it all out, but since the urethane foam it is glued with has degraded to dust, or will be dust as soon as you do anything (like touch it), I have rolled it up toward the front to keep it out of the way as it releases from the hard part of the headliner.

At some point I'll need to pull it all apart, remove it from the cab, and then I'll be able to clean it up without loading the interior with ugly brown slightly gooey dust. I will need to find a fabric store that is actually open. Here in NH they just announced that they want everyone to continue to stay at home for the rest of May. So a lot of stores are closed. But some (besides grocery and FLAP stores) are open, so maybe I can find one since they're letting a few businesses open up with covid rules to keep us from making each other sick. I'll hope it all goes well.

Anyway, the end result is that driveability is at 100%* for all intents and purposes. The only other thing it will need in the near future is some suspension work, but that can be ignored for now since it isn't critical. Yay!

Cheers,

PH

*That is, 100% for driveability. I still have the exterior tailgate adjustment and other body work to do!
 
Last edited:

ItAintRodKnock

Veteran Member
Joined
Sep 29, 2008
Location
Fraggle Rock, CO
TDI
01GolfTDi
Cant wait to read the whole thread and consider doing this myself.
Would you mind sharing the complete build cost?
Looks really well done!

Sent from my VS987 using Tapatalk
 

Powder Hound

Top Post Dawg
Joined
Oct 25, 1999
Location
Under a Bridge, Crestview, FL, USA
TDI
'00 Golf 4dr White 5sp, '02 Jettachero 5sp, Wife's '03 NB Platinum Gray auto(!)
Build cost: Well, I'll start out with the big stuff and fill in details as they occur to me. That means I'll edit this post over the next few weeks.

1) cost of the Jetta: $2500. Woulda-coulda-shouldas omitted here - they're in the thread. And the cost of this is variable anyway, so the number doesn't really count, does it?

2) kit: $3500. It's several hundred $$ cheaper right now, so jump on it now if you have the funds and desire. There was no shipping for me as I drove there and picked up the kit myself.

3) tools: Borrowed the ones I didn't already have. Specifically purchased were a rivet gun $20 (but used the borrowed pneumatic gun almost exclusively), and I'll add more as they occur. If you can't borrow one then you'll really REALLY want a sawsall or something equivalent. And make sure you have extra blades as even though the metal in the chassis cuts readily enough, trimming the fiberglass eats blades alive. Seriously, it is amazing. I actually used a small jigsaw for the fiberglass, but you'll still need multiple blades.

4) supplies: Here there are things like sandpaper, various blades, drill bits, silicone RTV, super-duper urethane sealant/adhesive, body filler ('metal glaze'), really heavy body filler ('tiger hair'), extra rivets, thread tap kit, anti-corrosion paint (POR as well as a zinc paint), masking tape, markers, and that kind of stuff. The list gets pretty long. About $400, I think. I hope that's a reasonable estimate, but there's no guarantee. I spent about $350 on paint which has not yet been applied, but that's your choice. Good paint jobs can run more than $2500, unless your brother does it for the cost of paint only which would reduce the price to $6-700 for good automotive paint. And that's for stock type colors. Seriously, if you've checked that stuff lately it is getting out of control.

5) Mechanical stuff - I'm leaving this out because it isn't really part of the kit build per se. It is directly relevant to the base car condition, and on that I stepped in more than 1 very large and deep cow pie, which you can read about (i.e. turbocharger and gearbox).

I also spent about $80 on sound deadening material not yet applied as the interior hasn't been a main area of concentration yet. I'll also be looking for some material for a new headliner if I can find a fabric store that's open. We'll see. That little part will be $15-20 for the cloth and at least $10 for the spray adhesive.

Recovery of cost due to selling take-off stuff: $0.

There's probably more trunk lids and rear doors available than you can shake a stick at. They weren't in high demand anyway, so. And those side curtain air bags: you can't really ship them unless you put a jumper across the contacts. But if any shipping company finds out what is in the box, they'll send you right back out the door with it, jumper or not. They just won't, and who can blame them? Besides, if someone has a chassis with a side curtain air bag that's exploded on them, chances are really good that the chassis is only a parts collection anyway, so they're not going to want yours.

So, it is looking like $4000 over and above the starter car chassis and paint. So far.

Cheers,

PH
 
Last edited:

Powder Hound

Top Post Dawg
Joined
Oct 25, 1999
Location
Under a Bridge, Crestview, FL, USA
TDI
'00 Golf 4dr White 5sp, '02 Jettachero 5sp, Wife's '03 NB Platinum Gray auto(!)
I added a new head unit. Basically it was the cheapest Dual that Crutchfield had. I just used the existing OEM speakers, not wanting to spend a bunch. I didn't even bother hooking up the antenna, since radio around here is really spotty at best, and I only wanted something I could plug a thumb drive into and listen to my play list. There's about 3000 songs on one drive, so I think it will last me a while before it repeats.

Anyway, the only real problem was that the adapter for the wires is a little bulky. So I had a bit of hassle trying to arrange the cables in the back so that the new unit would slide into place. Thing is, the plug on the new unit is on the opposite side as the OEM unit, so I had to slide them to the other side since I didn't really want to disassemble the dash to the radio cage. It took a while since I could only fit one hand down the slot at a time. But, in the end, mission accomplished and now it isn't so quiet in the cab. Not that is is quiet right now anyway, since there is at least one air leak I haven't found that lets outside noise in.

Cheers!

PH
 
Last edited:

Powder Hound

Top Post Dawg
Joined
Oct 25, 1999
Location
Under a Bridge, Crestview, FL, USA
TDI
'00 Golf 4dr White 5sp, '02 Jettachero 5sp, Wife's '03 NB Platinum Gray auto(!)
Oh, and there's a 2002 factory OEM head unit for anyone who wants to pay the s&h. Sorry, I don't have the unlock code. And I'm not the one who mangled the right side so that the faceplate has separated itself. It still looks correct. I don't know about the function. It turned on, but that's all I did.

There's also a hockey puck (aka CCV device, or PCV if it was a gasser) at the same deal. This one has nice hoses, but the 3rd little locator sprig is gone.

A spare CCV heater is available as well, for the same deal. I can't say I've ever heard of anyone wanting/needing one of these, but you never know.

Cheers,

PH
 
Last edited:

Lex4TDI4Life

Top Post Dawg
Joined
Jun 22, 2006
Location
NorCal
TDI
2001 Golf-Ute TDI GLS 5spd Manual
Got the shift boot placed yesterday. Today I checked the parking brakes. They work perfectly. Not dragging at all when they're released. I guess I was just assuming the worst when it didn't seem to work the way I wanted at first.

The headliner is giving up entirely. I haven't ripped it all out, but since the urethane foam it is glued with has degraded to dust, or will be dust as soon as you do anything (like touch it), I have rolled it up toward the front to keep it out of the way as it releases from the hard part of the headliner.

At some point I'll need to pull it all apart, remove it from the cab, and then I'll be able to clean it up without loading the interior with ugly brown slightly gooey dust. I will need to find a fabric store that is actually open. Here in NH they just announced that they want everyone to continue to stay at home for the rest of May. So a lot of stores are closed. But some (besides grocery and FLAP stores) are open, so maybe I can find one since they're letting a few businesses open up with covid rules to keep us from making each other sick. I'll hope it all goes well.
I redid my headliner and pillars with fabric and glue from https://www.grahamfabrics.com/headliner-fabric-and-kits/. I am sure I could have done it cheaper, but this fabric comes with the thin foam backing that gives a decent texture and sound deadening. I went with a charcoal microfiber, and it turned out decent. A normal, stretchy headliner fabric will be easier to install and look better. I will post pics on my thread soon.

On a side note, are you going with a 3rd brake light and, if so, what are you going with?
 

Powder Hound

Top Post Dawg
Joined
Oct 25, 1999
Location
Under a Bridge, Crestview, FL, USA
TDI
'00 Golf 4dr White 5sp, '02 Jettachero 5sp, Wife's '03 NB Platinum Gray auto(!)
I left the wires for the 3rd brake light, and I kept the original, so that is all available. I haven't made a decision. It's going to require some fabrication, and I just don't have the energy to do that right now.

In the meantime I haven't fixed my tailgate yet!! Maybe Monday.

Have a great weekend everyone!

Cheers,

PH
 

Powder Hound

Top Post Dawg
Joined
Oct 25, 1999
Location
Under a Bridge, Crestview, FL, USA
TDI
'00 Golf 4dr White 5sp, '02 Jettachero 5sp, Wife's '03 NB Platinum Gray auto(!)
Day 78

A short day; just an hour or so.

I decided to start the adjustment on the tailgate. First, the problem:


There's a couple of ways to do this, and I'm going to relocate the right side hinge and go from there rather than try and just add material to a large area and have to keep adding and adding. I kind of know how that would go and I'd rather add as little material as possible. So I'll relocate the bottom hinge and we'll see what can happen from there.

First, remove the hinge.


The tailgate slides off this side and then pulls straight off the left side. The cables unclip, then you reach up the inside so that a rachet can hold the backside locknut.


The above is a look from the bottom where you have to reach up to get the locknut with the rachet.


The offset measured at the hinge was 11mm. Here I've marked the new hole center and drilled a pilot hole.


New holes drilled.


Here is the new hinge. I ended up having to adjust the holes with a carbide end mill. The extra shavings are visible just below the holes.


Had to loosen and pull out the tail light assembly to get to the back locknuts so that I could adjust the striker for the latch.

And here's the result:


So you can see that the error is less, but still not completely gone. I found a little interference with the deck material at the right end, but I should be able to work on that. There may be other adjustments needed.

I can't figure out if the tailgate got bent or if the problem is just a little more involved than it appears. I don't think the tailgate got bent, but I'll have to look at it some more.

It could be that I just need to re-contour the top rear end of the quarter panel and adjust the taillight position. Of these, the taillight position would be more difficult. I had a great deal of trouble trying to get the darned thing to insert the first time and I'm not really looking forward to working on it more, but it appears that is what I'll need to do. Sigh...

Cheers,

PH
 

Powder Hound

Top Post Dawg
Joined
Oct 25, 1999
Location
Under a Bridge, Crestview, FL, USA
TDI
'00 Golf 4dr White 5sp, '02 Jettachero 5sp, Wife's '03 NB Platinum Gray auto(!)
Day 78.1

OK, sports fans! Today you get to give me a vote.

Which of the following do you like best? Just start at the top as number 1 and increment as you go down the logos.


My friend with the shop has a CNC plasma cutter. It does really nice work, but in small delicate stuff there are problems when detail lines get smaller than the diameter of the plasma port in the head. So, there will be manual work to smooth edges, remove a few blips (not a technical term), and then polish up the winner.

It remains to be determined how to attach it. I thought of using super sticky double sided tape, such as what 3M sells to re-attach factory stuff when it wants to fall off, or gets pried off by pesky neighborhood kids. Those plastic items are generally made for tape, where there is an edge and then the underside is recessed for the tape. These cut outs don't have that recess, and it won't be appearing anytime soon.

Another thought would be to just glue it with surface prep, and then go an extra subtle touch by painting it along with the rest of the tailgate (where I'm planning to mount it). If I did that, I could also tape it and count on the paint to fill in behind the lettering. And if the painted letters are too subtle, I could use a sanding block to polish off the top surface.

So, there is leeway. What do you think?

Cheers,

PH
 

hskrdu

Top Post Dawg
Joined
Oct 17, 2003
Location
Maryland and New England
TDI
2003 Golf GLS 4D 5M, 2015 GSW SE 6M
I like number 1, but I'd wouldn't have the whole thing in italics. I would attach with 3M. Quick, cheap, easy, and removable. The tape on factory letters is still flat to the bottom, even though there is a recess.
 

Powder Hound

Top Post Dawg
Joined
Oct 25, 1999
Location
Under a Bridge, Crestview, FL, USA
TDI
'00 Golf 4dr White 5sp, '02 Jettachero 5sp, Wife's '03 NB Platinum Gray auto(!)
Leaky interior

After wondering when I'd get some time to chase down a leak into Jettachero's interior, I was looking into it a bit.

Yesterday morning I decided I'd better dry out the interior. I put a dehumidifier on the passenger seat and ran a cord through the window, rolled up the window, and sealed it with blue tape. It works for a couple of hours if it is hot. I have found that when it gets hot inside, the dehumidifier's efficiency drops badly. Note: I did this last week and got more like 1 liter out.

I ran it a couple of hours in the morning and got maybe 500ml out. And I was looking a bit and found this on the interior of the rear window:


You can see the tracks left by earlier drips. That corner cut needs to be sealed, and I did not do my job on it.

So this morning I got out there and applied a little black silicone on both sides (left and right, not inside and out: both were the interior side) so that it would be in place before the mid-day rain started. The rain forecast was correct, but this time, I don't need to worry about mildew trying to kill the interior of the car. Well, the general humidity is so high right now, that is really a pipe dream, but I feel like I have a fighting chance now.

The rest of that fight will be won when I get the a/c working again.

Cheers!

PH
 

Powder Hound

Top Post Dawg
Joined
Oct 25, 1999
Location
Under a Bridge, Crestview, FL, USA
TDI
'00 Golf 4dr White 5sp, '02 Jettachero 5sp, Wife's '03 NB Platinum Gray auto(!)
Installed a head unit, so I'll have tunes once again. No antenna hookup so no radio. I saved the antenna base, but haven't drilled anything to mount it yet. No big deal - I don't know of any stations around here that I like anyway. So, I wrote a bunch of mp3 files to an SD card and stuffed that into a slot that is behind the face of the unit. I like that it isn't really visible from the front - makes the presentation cleaner.

I probably should have mounted the center arm rest as well, but I had just mowed the lawn and I was hot, thirsty, and hungry. And now, I'm just waiting a bit before I hit the shower then run off for a while. My house is being shown and will soon be sold. Jettachero has been very convenient to move stuff out to a storage unit so our final move out won't be so traumatic. I don't think my back could handle an entire move in just a day or two. Too many birthdays behind me...


Cheers,

PH
 

Powder Hound

Top Post Dawg
Joined
Oct 25, 1999
Location
Under a Bridge, Crestview, FL, USA
TDI
'00 Golf 4dr White 5sp, '02 Jettachero 5sp, Wife's '03 NB Platinum Gray auto(!)
Happy New Year everyone!

Well, to back up a few weeks, I resolved the leaking issue by sealing up the pop rivets used to help the install of the rear cab piece. I never did think about how bare rivets would leak water right down the middle as well as all around the sides because the countersink holes aren't perfect, and hardened FRP (aka fiberglass plastic parts - the official acronym is 'fiber reinforced polymers') doesn't seal that well all by itself against aluminum.

OK, so I had used a liquid tape compound, and it worked fine to prove the concept. A couple of days ago I finger-rubbed most of it out and used Metal Glaze to fill in all the rivet holes along the top and on the sides down the rear edge of the doors. There's a couple of rivets there to hold those parts - the cab end and the quarter panels - so I filled in those holes as well.

Since I recently moved, there's still a ton of stuff hiding in boxes that I haven't gotten to yet. It is an ongoing process and I'm somewhat at the mercy of how fast my wife wants to move as many of my boxes are covered. Since she's paranoid of me damaging some of her stuff, I am under orders not to touch anything until she OKs it. No problem; I've got time and there's plenty of other stuff to do around the house. What this means is that I had to go buy a new sanding block since I can't find my own. Frankly, I'm surprised I was able to find my supply of Metal Glaze! The sanding block is an absolute requirement if you want a decent surface when you are done sanding. Fingers end up making a wavy surface. They aren't firm and/or flat enough. You have to be careful around curves with a flat block, but really, fingers just won't do it.

So things are back to a slow progress right now. The weather is in a very nice temperature range. I can work outside and this will do until I get to the point it is ready to paint. Not sure what I'll do for that, but I'll think of a good solution when I get to that point.

Cheers,

PH
 

gsomersjr

New member
Joined
Apr 17, 2020
Location
WV
TDI
2002 Jetta, 2002 Golf
This is a great thread. I've had my Smyth kit sitting in the crate for a year afraid to get started because of the lack of good manuals ,instructions, or videos for the MK4, especially the Golf. They seemed focused on the Charger and Beetle builds right now. The camera work on the Jetta video is so shaky I don't see how people aren't getting motion sickness and the instructions that came with my kit have every model (Charger, Beetle, Jetta, etc) jumbled together so that it's impossible to decipher. I've talked with Mark a few times and he seems like a great guy so hopefully this will get sorted out. This thread is the best resource for the Golf build that I have found so far.
 

Powder Hound

Top Post Dawg
Joined
Oct 25, 1999
Location
Under a Bridge, Crestview, FL, USA
TDI
'00 Golf 4dr White 5sp, '02 Jettachero 5sp, Wife's '03 NB Platinum Gray auto(!)
At some point you just have to get the wrenches out and start in. I say wrenches, because the first thing is of course, to strip out stuff that isn't going to remain or make it into the final product.

You can disassemble a lot. All of it can be backed out (put the car back to OEM car) until the absolute commitment, which is the roof cut. So work up to that and get your sawsall blade ready!

Cheers,

PH
 

Lex4TDI4Life

Top Post Dawg
Joined
Jun 22, 2006
Location
NorCal
TDI
2001 Golf-Ute TDI GLS 5spd Manual
Hey PH. Wondering if you had run into any issues locking and unlocking with the doors and trunk removed.

On my Golf-Ute, I am unable to use the fob to lock the doors, but I can unlock them with the fob. The same is true when using the key in the driver's side door. I decided to throw parts at the problem, figuring it was just a flaky door lock module. No dice. However, in the process, I discovered that disconnecting the window motor would magically let the fob work again. My best guess here is that when everything is plugged in, the CCM sees no rear doors, no hatch, and figures the doors are open and won't let me lock.

Have you jumpered any of the connections or recoded anything to keep your locks working (assuming they still do)?
 

Powder Hound

Top Post Dawg
Joined
Oct 25, 1999
Location
Under a Bridge, Crestview, FL, USA
TDI
'00 Golf 4dr White 5sp, '02 Jettachero 5sp, Wife's '03 NB Platinum Gray auto(!)
I haven't had to do anything. I unplugged the rear doors, leaving the factory plugs on the harness. Same with the trunk stuff. My doors lock and unlock just fine. It makes me wonder if the CCM needs to have the plug pulled and then pushed back in, just to refresh the wire connections.

The only electrical issues I've had are the turn signals blinking fast because I did the rears with LEDs (my own design), and a key fob that hadn't been used for so long that I replaced the battery and then had to put one fob in the door and the other in the ignition. I don't recall which one went where - I think it was the unused one in the door. And of course the turn signals fix is preferred to be fixing the blinker module rather than try and find a silly expensive resistor. Just haven't done it yet.

Cheers!

PH
 

Lex4TDI4Life

Top Post Dawg
Joined
Jun 22, 2006
Location
NorCal
TDI
2001 Golf-Ute TDI GLS 5spd Manual
Thanks for the insight. I should probably scan the thing with VCDS to see if any odd codes are hiding. Also, it may be a different situation because the golf has a hatch, unlike the Jetta. Another mystery....
 

Mozambiquer

Vendor , w/Business number
Joined
Mar 21, 2015
Location
Versailles Missouri
TDI
2004 VW Touareg V10 TDI, 2012 Audi Q7 V6 TDI, 1998 VW Jetta TDI. 1982 VW Rabbit pickup, 2001 VW Jetta TDI, 2005 VW Passat wagon TDI X3, 2001 VW golf TDI, 1980 VW rabbit pickup,
Thanks for the insight. I should probably scan the thing with VCDS to see if any odd codes are hiding. Also, it may be a different situation because the golf has a hatch, unlike the Jetta. Another mystery....
Look in the scan tool forum at the free vag-tacho thread. Should be able to code the ccm for two door.
 

Powder Hound

Top Post Dawg
Joined
Oct 25, 1999
Location
Under a Bridge, Crestview, FL, USA
TDI
'00 Golf 4dr White 5sp, '02 Jettachero 5sp, Wife's '03 NB Platinum Gray auto(!)
OK, well I am finally getting back to work on the Jettachero. I have recovered the headliner. I purchased some material, and have a hot tip for anyone else doing this: don't use a weave, buy a knit. I actually knew this, but my blood sugar must have been low and I bought this other stuff anyway. Yet another in my very long list of foolish things I should not have done because I actually knew better ahead of time. Sheesh.


The material is a cotton flannel weave and the penalty is that it cannot closely match the indents for the oh-my-goodness handles nor the middle part by the central light and sun visors. So I ended up cutting and pasting new pieces.

I used nearly a full can of 3M 90 spray adhesive. It works well, but doesn't go nearly as far as I thought. The patch job was done with a water soluble clear glue, so in the end it looks OK but I have reservations about its longevity. If the worst happens and I decide I need to replace it, at least I will know what I'm doing the second time around. Maybe. I also don't know if the metal rims around the light pod and the two courtesy lights that get turned on by sliding the mirror cover in the sun visors can handle being flexed too many times. They've already gone through installation at the factory and now from me, so they might not last for a 3rd time. We'll see, I guess. So, it might get annoying. Or not. I'm just going to ignore it for now since the patches are in places that are normally covered by sun visor or grab handle.

I wish I had a well stocked parts yard to go get spares, but none of the 2 around me have much of anything. Only 1 has anything, and he has a couple of New Beetles, and only wants to sell large assemblies. Such as a complete door. No parts from the door, only the whole door. Hmm...

I am taking this opportunity to replace the interior mediocre lights with some LEDs.

This is really the start of a whole new treatise on LED conversion lights, and there's lots and lots of other BS about LED lights in cars that did not have them engineered from the get-go. That is, replacing an incandescent with an LED isn't always successful when you buy a chinesium device in your local FLAPS.

The main problem with these things (the chinesium ones) is that they're using small cheap LEDs that were never designed for more that 4 or 5 milliwatts. You bump them up in power to get the brightness you want, and you limit the life of these things to a few hours, if not mere minutes. These devices are not built with the heat rejection necessary to sustain a real LED built to use that much power (you need 300 or more milliamps to get 1 watt out of an LED at the Vf these operate at) let alone have a chance of efficiently using that much power. You MUST get LEDs made for it, and that means expensive.

But (at least of a few years back) at least 1 company (Phillips) who makes Lumileds does that. I've heard that Cree does so as well, but I'm not thrilled about sending $$ to China these days, so when I can I vote otherwise. Especially since Phillips is providing such an outstanding product.

For this, I'm using the Lumiled Rebel package. They are efficient, reasonably priced (well, I'd like free, but...), and have a great heatsink pad in the back. I solder them to a piece of copper which provides the heat rejection you need. The contact pads are also on the back of the package, so you have to be careful (cut a hole) of the leads.

Anyway, I'm just getting into the working of the lights, so I will continue this part in more installments.

In other news, it has been a while, so I decided I needed to see if there's animals in the back using the spare tire well as a swimming pool or not.

The floor of the bed is aluminum extrusions (hardened) bolted to aluminum cross members. The hardware used, of 3 of the bolts, managed to weld themselves in the cross members, so it took about 3 days of constant PB blaster to finally get them to budge. I won't forget the anti-seize again.

I also found that the little drain in the spare tire depression decided to clog and I was dragging about 100 pounds of water around. After draining it, I found that all the prep I did before did its job. The only rust was a little bit from the rim of the spare itself. So no bad damage done, and I have cleaned up the drain hole to help keep that from happening again. Yay! I would encourage anyone doing this conversion to check the spare regularly. You don't want to be on the side of the road because the <bleep>ing bolts won't come loose to allow access to the spare. And use anti-seize. The silver stuff. The copper stuff might cause some reactions you don't want to see in aluminum.

OK, so another post is coming all about LED lights.

Cheers,

PH
 

Powder Hound

Top Post Dawg
Joined
Oct 25, 1999
Location
Under a Bridge, Crestview, FL, USA
TDI
'00 Golf 4dr White 5sp, '02 Jettachero 5sp, Wife's '03 NB Platinum Gray auto(!)
Working on the lights...

So here is the main light in the interior. I have inserted copper which is folded and trimmed to fit. It will be the heat sink for the LEDs. I happen to have 24 gauge copper sheet. It is not real easy to work in small pieces - if you were to do the same thing I think I'd recommend 28, 30, or even 32 gauge instead.

This is the rear view.

Without the lens. The lens sort of lifts from the front of the light assembly and is "hinged" at the middle of the box. Just lift up on the leading edge to pull it off. That gets you access to the 10w festoon bulb. The smaller festoons in the vanity lights as well as the 2 smaller lights on the side of this main box are 5 watts. You can see a channel in the middle. I'll be using that for the wires and to add a spring effect.

Here is the light box without the copper or lens. Or bulbs. You can see a hole in the middle of the large cavity. I believe that is for convective cooling. I will leave it mostly undisturbed, but I don't think the LEDs will heat that much. Or maybe they will, but surely more electricity will end up as light than the festoon incandescent bulbs could convert to heat.
 

Powder Hound

Top Post Dawg
Joined
Oct 25, 1999
Location
Under a Bridge, Crestview, FL, USA
TDI
'00 Golf 4dr White 5sp, '02 Jettachero 5sp, Wife's '03 NB Platinum Gray auto(!)
More material on the LEDs. I have the problem of tracing the copper on the back to ensure polarity. Festoon bulbs (as all incandescents of which I know) don't care about polarity, but LEDs, being directional diodes, after all, do care and won't work if you get it backwards.


This is the rear again. The red box drawn in shows clips to hold a relay. I have no idea what it is used for; maybe it has something to do with other visors, self dimming rear view mirrors, or something like that that us stupid 'murikans were not allowed for our TDIs. Anyway, after not being real sure of how the switches worked, I figured I had it and then plugged it into the car and tested to be sure. And marked. Pretty easy.

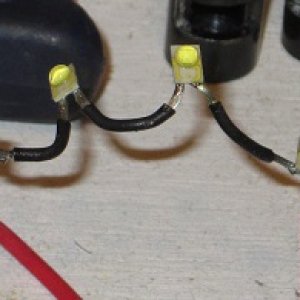
Here are the target LEDs. The front side. White LEDs are actually a blob of white phosphor on top of a UV LED. Kinda like florescent lights but without the mercury. They're pretty small. I have these 4 soldered up for 1/2 of the main light. Red for the positive lead, and brown for the ground, ready to be connected to the power controller while sort of complying with german wire colors for ground and power (except for color coding for various circuits, of course).

The backside of the LEDs, showing the solder pads. The larger solder blobs not connected are the pads for the heat sink that I have pre-soldered to make it easier to solder to the heat sink.
Note the 4 loose ones that will go into a similar string.

Since the Vf of these white LEDs is just over 3 volts, I set up my controller to provide 320ma. This provides about 100 lumens from each LED and the consumption of about 1 watt (.320ma x 3.nnn volts). Also, when you add up the Vf of the 4, you have a little over 12 volts being consumed by the LEDs. The controller will make up the difference, ensure the voltage supplied to the LEDs will light them up to where they are using 320ma each, and absorb the difference which is why the controller needs to be heat sinked as well. But I do not believe the controller will need much help. Nevertheless, that empty area on the reverse side of the main light box is where I will place the controllers for all 4 circuits. That is 2 circuits for the main light, and one each for the side lights. The main light gets 2 because, after all, it was a 10w festoon and apparently it is supposed to be a brighter light.
 

Powder Hound

Top Post Dawg
Joined
Oct 25, 1999
Location
Under a Bridge, Crestview, FL, USA
TDI
'00 Golf 4dr White 5sp, '02 Jettachero 5sp, Wife's '03 NB Platinum Gray auto(!)
Time to resurrect this thread.

The most recent stuff above about the lights having been put on hold due to frustration due to difficult sizing on those LEDs, I decided I needed to get going and finish this project. I will probably be changing LED types. I also ran into trouble because the low end version of my soldering iron crapped out on me. So I am going to be working on the truck, and maybe the lights in a week or two, along with some other stuff in the interior.

This week I completed the side skirts (or whatever they are called) that hang under the doors. They are the forward portion that really extend from the side panels on the bed. Or are the extensions that match that lower portion of the bed sides.

I chose to attach them with a combination of rivets and Dupont urethane sealant Betaseal U-428 Plus. I've used it before. It is supplied in a metal tube similar to caulk, RTV, construction adhesive, and many other materials that come in similar shaped tubes. I have to say, it is an excellent adhesive for use in gluing panels together or other similar uses adhering dissimilar materials (e.g. fiberglass and steel). This adhesive is made to cure reasonably rapidly via moisture absorbed from the air. It is extremely viscous. You might break a cheapie caulk gun. Get a good one. And have a strong grip. It has a large amount of high quality carbon black, so it is really black. And use disposable gloves. Anything you get on your skin will be cleaned off as soon as you are done (acetone on paper towels works for me) or you can count on waiting until it wears off.

In the instructions for the truck build, there is disappointingly little information on the best way (or any way, really) to attach these pieces. So you get to figure your own way. I haven't done any review of any one else's methods, so if you have already seen something that looks better, then use that. I won't feel bad. But if you mention that to me and/or provide a reference, I'll be appreciative because there's another build in my future, hopefully starting before the end of the year (2024). And any better ideas will save time and probably money as well.

The other thing I did this week was to finally repair the right rear tail light. It took me some time because of the way I implemented the turn signal along with the reverse lights, which don't match up with how Ford did it for their pickup from which this light was taken. For example, it looks like Ford did the turn signal by blinking one of the brake light filaments, while VW has a separate turn signal lamp. It also took some time because of lax quality control by the Depo folks that end up with light capsules that do not match closely with different production runs of this same lens assembly. If you use these, and I don't see how you can not use them, be ready to make adjustments.

Not that it matters, but the reason I had to do this is because the lens assembly was broken by a lift truck putting a block on a crate into the back of my Jettachero. The yard bought me a new lens assembly, but I did not realize that the lenses are not quite interchangeable. It was a frustrating experience. Thankfully, now complete. Until the next time. Sigh...

I will attach some photos tomorrow and show where I will be doing some more work to fill in the gaps and cracks. I will also be pointing out the offsets that show up when you don't read the instructions completely and dive in. I have one side that looks pretty good and the other side that has a problem. Ugh. I am getting myself conditioned to get it as good as I can and then ignoring it while being glad I wasn't shooting for a show truck.

I also replaced both front fenders due to rust and dents that I do not have the skill to correct on my own. It just looked easier to buy a couple of new ones and go with it. I bought the fenders off ebay and they come from Taiwan. Good price, but they suffered from the same malady that impacts anyone anywhere that tries to ship automotive sheet metal more than 10 meters. Interestingly, a close examination of the fenders removed show that the old ones are probably sourced from the same place. Small world, and understandable since VW is so <bleep>ing proud of their stuff. And I'm paying out of my shallow pockets, so...

Still, I had a couple of dents to fix on each but were all relatively easy to do. Yay!

I added some glass reinforcement to the upper corners of the rear bumper cross member. That is where it attaches to the rear of the bed sides. It looks like that will do it. I think it shows that fiberglass and resin is the best way to glue fiberglass parts together. Otherwise you get cracks eventually. With the glass and resin, the same material the parts are made of, would have a much lower chance of differing flex properties and coefficients of thermal expansion to mess up the end product. FYI the glass and resin for this is found in a large can of "Tiger Hair" which is a product by Evercoat. It is a resin with a lot of fiberglass mat (chopped fiber) stirred in. It is quite messy, but you work it in small globs and it seems to work very well. Between this and a couple of other Evercoat body products (Metal Glaze and Z-Grip), I like them better than Bondo products. Just my personal preference.

I also took a look at the floor under the bed. I poked under there because I needed to get to the wiring to fix the tail light assembly mentioned above. The waterproofing products I sprayed there seem to be holding up very well, probably because they are protected from direct sunlight. So I'm not worried about iron termites eating my pick-em-up truck in an unseen area. Not anymore anyway. And it really helps not to be living in the rust belt anymore, too.

So, on the exterior, there's the fill and smoothing work to be done around the new parts, a dent to re-do on one of the new fenders, metal parts on top of the bed sides, and a couple of parts on the end of the bed. These are cosmetic, mostly, and won't take a lot of time to install. I just need to decide how many rivets to use and where to put them, since the instructions don't say much of anything (naturally). Probably there will be some more U-428 involved as well. I only used a little over half the tube today in the install noted above so I have a reasonable amount available. And it is quite perishable once the tube is opened, so time to strike while the glue is gooey. (Note that U-428 will cure sufficiently within an hour or less even if cool (60s) to be unworkable. You have to seal the tube with something like aluminum foil that is moisture proof. I use foil and wire or something similar to seal the tube end. That will work for a week or two.)

On the interior I have a bit of reinforcement on the rear upper part of the back of the cab. I put a couple of diagonal cuts I made to get that surround part to install, and it keeps cracking. So I'll do reinforcing in the same manner that worked for the rear bumper cracks. I also need to finish the lighting and then reinstall all the interior lights, the sun visors, the OMG handles, and anything else that is needed. I also need to figure out where to find some reasonably priced window tint, but the reasonable price part may be the title of an exercise in frustration.

Then comes paint. New project here. I have polyurethane paint, 4 quarts of dark blue and one quart of white, and I need to figure out how to apply it to create the effect I want, and I'm not going to say anything more about that until it is done. It may take a while - there's a lot of prep to do before the paint goes on the trucklet.

Cheers,

PH
 
Last edited:

Powder Hound

Top Post Dawg
Joined
Oct 25, 1999
Location
Under a Bridge, Crestview, FL, USA
TDI
'00 Golf 4dr White 5sp, '02 Jettachero 5sp, Wife's '03 NB Platinum Gray auto(!)
Ahhh... the promised photos. Hopefully they are as informative as you need.


This is the left side of the middle of the chassis. The junction between the bed and the cab, with the skirt at the bottom, of course. In these photos you will notice a lot of white/gray streaks. I've been working on the rear of the cab as it isn't nearly as smooth as you'd like. That is what comes out of the mold.

I have this to say about the fiberglass. Having done some myself I can say that creating a perfect mold is something that takes a ton of work. If you don't have a gazillion dollar CNC machine to do the carving, and a giant block of certified unobtanium to carve it out of, you can spend forever making a mold, trying to get it just right. So to have a few surface flaws appear in the parts you get is pretty much part of life on this planet. Having said that, the quality of the 'glass you get from the Smythe Ute guys is excellent. It is strong and doesn't have many flaws. If I tried to do a better product, I'd still be trying to get the first set of molds done, even after all this time. Anyway, back to our regularly scheduled program.


And a slightly different angle.


These show the same junction, from slightly different angles. There is a slight flaw in that the underside of the skirt has too much material on the bottom which pushes it out a little. I think I will have to make a cut on the underside to get rid of the excess so it will line up with the skirt on the bed. I can use some of the U-428 adhesive when I'm done cutting. Just need to make sure I cut the correct amount. Actually, this problem will stew until I get ready to fair in the junction filler.

Here's the right side.


It doesn't show up in the photo so well due to the angle, but there is a slight mis-match in the alignment of the bed on this side. It is better on the left side. This is the type of flaw that occurs if you don't pre-assemble and take the time to guarantee fit all over before you do the final assembly and lock parts into place. I'd feel bad about it, but it isn't a show car and the flaws won't really be that noticeable except to a critic that probably hasn't ever done one of these themselves. Meh, it will look good and I like it.

The underside of the skirt and glue joint there.


This is the underside of the skirt, showing the plain butt joint with the U-428 adhesive just gobbed over the joint. I left it not continuous to allow any water ingress to exit just as easily. And really, you just need enough glue to hold the skirt so it won't vibrate and cause a noise.

If/when I cut this side so it achieves a similar fit on the side matching the rear bed side, all I will need to do is apply some more glue to hold the sides of the cut together in the same manner as this joint.

OK, so that's the current state of progress.

Cheers!

PH
 

Powder Hound

Top Post Dawg
Joined
Oct 25, 1999
Location
Under a Bridge, Crestview, FL, USA
TDI
'00 Golf 4dr White 5sp, '02 Jettachero 5sp, Wife's '03 NB Platinum Gray auto(!)
So as of today, I have attached both side skirts fully and filled in the gaps as well as filler on top of the rivets. I still have to sand down the right side. The left side is pretty much done. I'll take a few pictures next week when I get the right side sanded.

Sorry the progress is so slow, but other things have been trying to suck off my time. I decided to tint the windows on my Golf, and will do the windows on the trucklet as well. In doing the windows on the Golf I found it was best for me to remove the windows, do them inside my house, then reinstall the windows. Doesn't work for the tailgate, but the doors, yes. Unfortunately, when I started the reinstall of my left front window, the regulator clamps broke and left me with having to tape up the window until new parts get here, which should be in 3 - 5 more days.

In the meantime I still have the right front and the fronts of the trucklet.

Cheers,

PH
 

Powder Hound

Top Post Dawg
Joined
Oct 25, 1999
Location
Under a Bridge, Crestview, FL, USA
TDI
'00 Golf 4dr White 5sp, '02 Jettachero 5sp, Wife's '03 NB Platinum Gray auto(!)
So I received parts and fixed the front left window on my Golf, which is properly mounted in the door again. The unfortunate detail on the repair parts is that the new metal clamps have a very small amount of flashing that makes it very difficult to mount the cables in them. I tried at first to fix it with some wet-dry silicon carbide sandpaper. Works, but it is horribly slow to do it that way. I bought a cheap set of needle files and was able to do 3 pairs of clamps in less time than doing one hole of one clamp of the first set I used (each clamp has 2 cable ends into it, in case you've never had the pleasure). Sheesh. Such a tiny and yet completely frustrating detail.

So yesterday I went to tint the driver's side door, having done the right side last week. Door card off OK. Pulling the glass out, not so good. The rear clamp's bolt refused to move at all and I ended up twisting the clamp apart since they were original and the plastic can't stand that kind of torque. Thing is, once you see a clamp, the whole clamp, twisting off the glass, you know you are <bleep>ed. So I pulled the inner steel panel off. I am so glad I just went with ordering extra clamps because I had the repair parts all ready to go.

I took about 30 minutes to get everything laid out and the new clamps in place. It took another 2 hours to so to finally get those cables back in place in the regulator set up. I added some extra lube. Unfortunately, I did not have the OEM lube and used a little Redline CV2 instead. I don't think enough air gets in there that I will be smelling it, so I'm not worried.

Note for those who don't wrench for a living or as a hobby: Gear oils and greases, or heavy duty high pressure grease (which is what the Redline CV2 is) have an advantage that they can use the best anti-wear additive ever, which is molybdenum disulfide. That stuff works a low temps and works very well, with the one drawback of the smell of the liberated sulfur when activated. In closed gear boxes or bearings, who cares? In your face all the time, no fun.

Anyhow, I am making progress on window tint. There will be a pause on all of them while waiting on procuring foam for reassembly of the cloth covered parts of the door cards. I ordered some polyester foam sheets used for packing and here to be used for the padding under the cloth. All I need to do is find a good adhesive. If the 3M type 90 doesn't work, there is always weatherstrip adhesive, where the trick will be spreading it evenly. Oh, the fun!

I was able to sand down the hood on the Jettachero in preparation of new paint. There were lumps where I had sanded rust spots previously and then applied some zinc paint in an attempt to apply something that would eventually plate itself to the steel, but that didn't work. Maybe you'd need to apply it while running an electric current through it or some such thing, but I'm just going back to the regular paint regimen and hope it works better down here where there is no salt. Unless you like the beach a lot. But the OEM paint was rather thick and since the zinc paint was just applied in small spots and made lumps, it took me a while to sand them off so I could at least spray on some etching primer. (Rattle can stuff from a professional car paint store.)

If you look closely under the correct lighting you can see small spots where the surface was sanded down. It is as if there are small craters, even though they are only a couple of thousandths deep. I will be painting a dark blue color, so maybe I should just skip it since this is pretty much a "work" truck and won't be hitting the show circuit, but still, I so have some self respect, in spite of a few other mistakes I made that I can't go back and fix without tons of effort that I don't have in me anymore. So. I'll look at it today and if I can fix the craters in very little time, I'll do it.

Otherwise it is time to read the directions on the primer I'll be using for the topcoat I will use. I am going to try a polyurethane paint I can brush on. If the self leveling additive I bought along with it works, it will be a tremendous savings of both material and overspray mess in my garage. If not, a lesson that will be learned and saved. We shall see.

Cheers,

PH
 

Powder Hound

Top Post Dawg
Joined
Oct 25, 1999
Location
Under a Bridge, Crestview, FL, USA
TDI
'00 Golf 4dr White 5sp, '02 Jettachero 5sp, Wife's '03 NB Platinum Gray auto(!)
Short entry because a lot of effort has been put into applying tint to my Golf and fixing incidental problems found there. In the meantime, Jettachero's windows are both tinted. It went well. I am also fixing the sagging/failing fabric on the door card inserts and will probably spend an undue time getting the door cards back together due to problems with the crappy plastic used as the base to the door cards. See my post in the what have you done to your Mk4 lately thread (post 12521 in that thread).

As far as finishing progress, I needed to sand numerous rust spots on the hood that were hiding under lumps of zinc paint. The paint was applied in a failed attempt to provide a zinc material that would stop the rust, but without the correct galvanic bonding the sacrificial corrosion of the zinc didn't happen. Oh, well. So I spent many hours and a lot of sand paper wet sanding all those spots and then applying a nice coating of etching primer. I think the hood is ready for actual paint prep now.

There are a few other details such as some finishing on the aluminum parts that still need to be installed on the bed sides, tailgate, and elsewhere. Luckily the parts are aluminum. The process the Smyth Performance guys use to cut the aluminum leaves a very rough edge, so I will be sanding that down. It uses up a lot of sand paper, even the silicon carbide stuff. Aluminum itself is pretty soft, but aluminum oxide - that's new ball game.

I will see if I can take a few photos this week as I work on it.

Cheers,

PH
 
Top