ALH TDI engine transplant into '84 Vanagon

AndyBees

Top Post Dawg
Joined
May 27, 2003
Location
Southeast Kentucky
TDI
Silver 2003 Jetta TDI, Silver 2000 Jetta TDI (sold), '84 Vanagon with '02 ALH engine
Update:

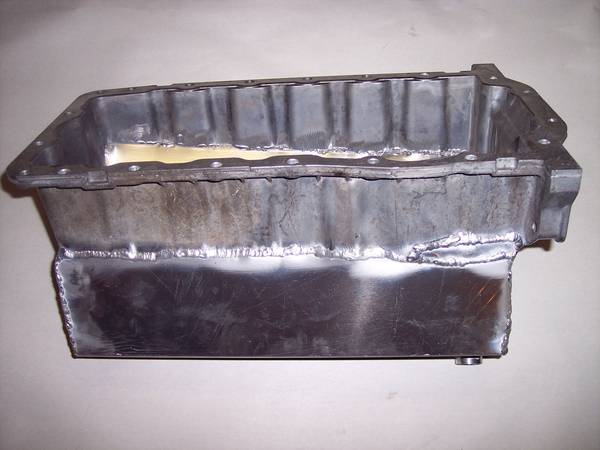
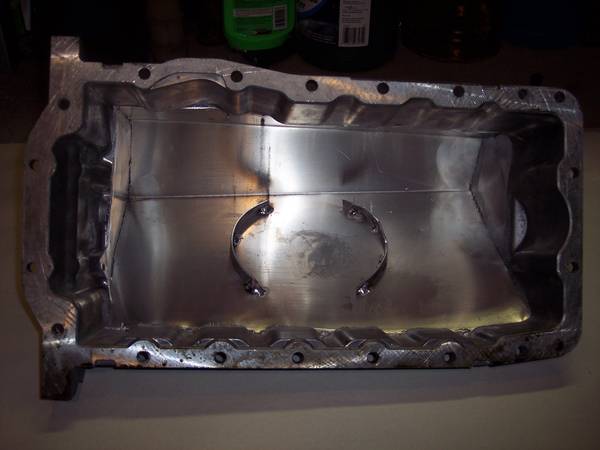
Finally, I delivered the oil pan to the aluminum welder last evening. He says it will be ready Friday afternoon.

I went over all the things I need welding with him relating to the Intercooler, piping, etc. He said that he rather that I be present to make sure he got everything right ....pointing in the right direction primarily!

Also, my metal welder promised the motor mount brackets will be finished on Friday as well.

If all this comes to fruition, I'l be pulling the engine out........yes out, to install the flywheel, clutch, throw-bearing, etc. If you have been reading all the details, as you may recall, when I set the engine in with the cherry picker hoist, I wasn't sure it was really possible. So, I went as light as possible!

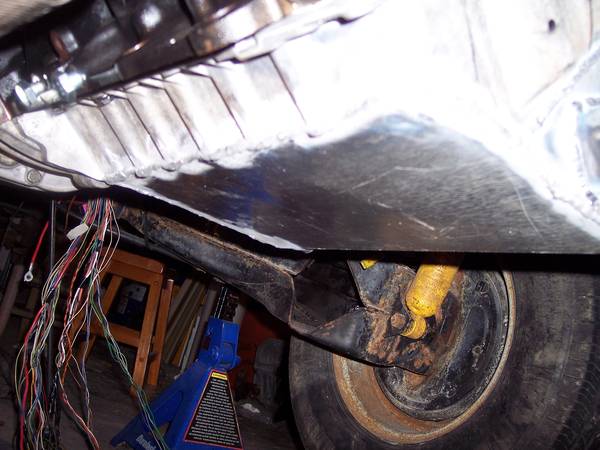
Here is a shot of the Intercooler! It is on the left side just in front of the tail light assembly and behind the wheel well. I was just making sure it fit the hole. Even though I pressure washed the vehicle really good .........lots of crap fell in my face as I cut-out the hole from below!

I will be mounting a 300 CFM fan on top. And, it is my intent to isolate that area to keep out engine bay heat. All the air will come down from the out side Vent!


This is another view looking thru the hole where the Tail Light Assembly is mounted.


Additional photos of the IC......

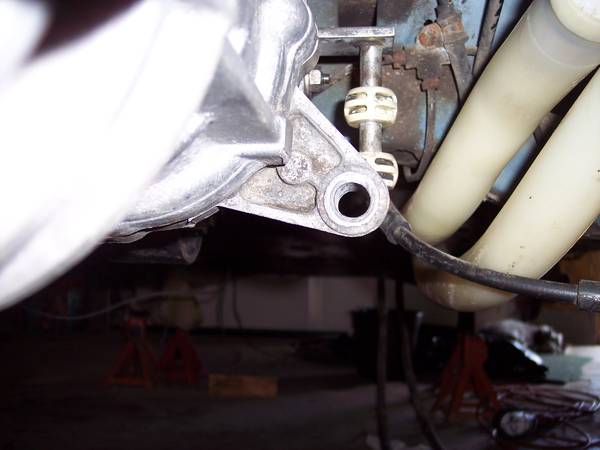
This is the InterCooler looking up from the bottom.....pipes are cut off! Also, you can see the approximate location of the 2" OD outlet pipe going up to the Intake! The Turbo is directly behind the black carrier bar. Also, in the background you can see the prototype left side motor mount bracket.


This is a close-up of the Outlet side of the IC. Notice the "aluminum dust" inside. That all washed out really nice. I feel good there are no bits left inside to worry about.


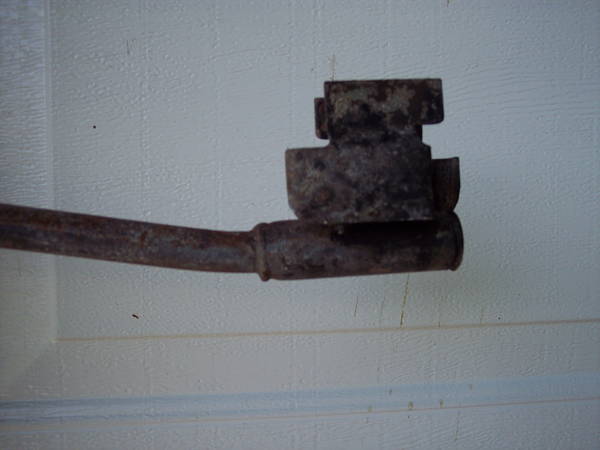
This is a close-up and different angle of the discharge pipe from the IC. The rear of the Vanagon is to the right. The Intake pipe to the Turbo can be seen in the background (the black flex plastic pipe).


Lastly, this is a shot of the Turbo. Notice the discharge is pointing toward about 10:00 O'clock. That is in the general direction of the inlet to the Intercooler. The 12 inch Turbo silicone hose will actually touch the carrier bar. Also, you can see I used the OE rubber connector to the Inlet side of the Turbo!
 
Last edited:

Growler

Got Soot Vendor
Joined
Nov 24, 2003
Location
Millersport, Ohio
TDI
Schmutz, 2015 Golf Sportwagen DSG & Schnurren, 2001 Golf GL 2 door 5M
My guess..

spray paint can? :)

Looking good. gonna have it ready for Fest?
 

AndyBees

Top Post Dawg
Joined
May 27, 2003
Location
Southeast Kentucky
TDI
Silver 2003 Jetta TDI, Silver 2000 Jetta TDI (sold), '84 Vanagon with '02 ALH engine
My guess..

spray paint can? :)

Looking good. gonna have it ready for Fest?
Well, yes that's sort of it! You are really right and Rackaracka was close too in that he was getting close by thinking of some kind of spray can!

It is one of the Taller spray paint cans....one of those that coated the outside of the fuel tank!

Gees! Guys, when you're doing this kind of project, you have to improvise. Otherwise, you'll be searching the Internet for something that just don't exist.

Also, I learned later than one of those big tall 134R freon cans (aluminum) will work too!

I'm trying my best to have it finished for the Fest.......but, it ain't looking good!

Now, either one of you guys going to be at the Fest?
 
Last edited:

AndyBees

Top Post Dawg
Joined
May 27, 2003
Location
Southeast Kentucky
TDI
Silver 2003 Jetta TDI, Silver 2000 Jetta TDI (sold), '84 Vanagon with '02 ALH engine
Update: EDIT: The two rubber pieces (see pics below) have held up extremely well. In fact, they still look just fine after 5 years and 80k miles sliding in grease. There are zero vibes in my gear shift. edited on 12/28/2017

Today, I addressed loose ends, so to speak!

Although I previously stated the tranny was shifting fine, it never satisfied me. So, today, I removed the shifting lever from the tranny and the guide pin.

The shift lever, which is mounted to the tranny, had two worn spots on it. I super cleaned it and added a layer of JB Weld....my favorite stuff.

The shifter guide pin, which is mounted to the tranny and goes inside the last section of long linkage, has a round piece on the end with corrigated plastic to absorb vibrations and to allow for smooth shifting.

Well, the guide pin was all but useless and allowed way too much slop for good shifting. Combine that with the worn knob on the shift lever the tranny would not go into 1st and 2nd gear. Reverse was very difficult to achieve as well.

So, here are a few photos. Those who know Vanagons will recognize these items!


This is a close-up of the end of the linkage guide pin. Notice the two rubber bushings.......off the shelf stuff and fits perfect. I cut a groove on the right side and filled with JB Weld. On the end, I drilled and tapped the pin. I then installed a screw with washer and JB Weld. The pin actually has a grated surface to help hold the original ball with the corrigated plastic ball that was on the end.


Another angle. Notice, I offset the two rubber bushings! White grease should work just fine!


In this photo you can see where I added the JB Weld to replace worn off material. I did have to sand and polish it down for it to fit properly!.........nice and snugg!


Use your imagination: This is a photo of the shifter linkage. The guide pin goes into the bottom part and the shifter with the two balls on it goes in the top part. Of course, the whole assembly is bolted to the side of the tranny!


This shot shows where the guide pin goes and you can also see the two ball shifting lever above! The guide pin goes into the big hole there on the side of the tranny! EDIT: See the white radiator pipes to the right? I did not use them. I stayed with the OE metal pipes.


I also spent a good number of hours today working on the wiring harness................ Gees, it is almost overwhelming! I went into it early on using assumptions as opposed to measuring and actual application of the various connectors at the engine bay. But, I wasn't very bad wrong with most of the assumptions.
 
Last edited:

markward

Veteran Member
Joined
Jul 5, 2007
Location
Loxahatchee, Florida
TDI
82 Vanagon and 2011 JSW
Andy, I have the time available to head up to the fest, but have not registered. If you and Jon are going to make it, I will head up there. We are coming into the peak of our hurricane season, so I usually try to be home this time of year. Progress is progress Andy. I used CAT 5 computer cable between the front and rear. I have a total of 4 runs. This accomodates the accel pedal, cruise, vss, clutch, and brake light switches and a couple other things that escape me.

I am using nonplenum wire. It is multi strand copper, so it remains flexible. Because it is computer cable, it is made up of twisted pairs which seems to be a good thing as far as rf interference etc. mark
 

AndyBees

Top Post Dawg
Joined
May 27, 2003
Location
Southeast Kentucky
TDI
Silver 2003 Jetta TDI, Silver 2000 Jetta TDI (sold), '84 Vanagon with '02 ALH engine
Mark, the wife and I are registered for the Fest, including the main event on Sunday night............ I'll be there if I have to drive my Chevy Blazer....LOL Although we will not be in the event hotel on Friday night, we will be there hanging out with the crowd. We will be in the event hotel Saturday and Sunday nights! ...............missing the annual family reunion!

The Jetta needs a solid 4 hours of cleaning, inside and out! And, I'm trying my best to have the Vanagon road ready........but, it's doubful! My welders are almost to the point of holding me up.

I'm finishing the gas tank/fuel lines today! Also, I have a complete front suspension ready for all the bushings, ball joints, etc., that I hope to have ready for installing over the weekend.

Other than going over the various systems, I've not installed the first wire! However, I hope to do some of that beginning on Monday!
 

Growler

Got Soot Vendor
Joined
Nov 24, 2003
Location
Millersport, Ohio
TDI
Schmutz, 2015 Golf Sportwagen DSG & Schnurren, 2001 Golf GL 2 door 5M
Andy, I will for sure be there for Fest, and look forward to meeting you in person.
 

jjordan11

Veteran Member
Joined
Jan 5, 2008
Location
Lehi, UT
TDI
1988 Audi 80 quattro PD130, 1982 Westfalia TDI
It looks like I won't be able to make yet another TDIfest. It's difficult to schedule things too far ahead with two small children. Your Vanagon is looking really good and the loose ends are getting all tied up.
 

AndyBees

Top Post Dawg
Joined
May 27, 2003
Location
Southeast Kentucky
TDI
Silver 2003 Jetta TDI, Silver 2000 Jetta TDI (sold), '84 Vanagon with '02 ALH engine
Did you ever wonder what the dude was thinking while he sprayed that waxy protecting stuff on the bottom of your car.......in my case, the '84 Vanagon? Seems they just spray at random! And, seems the places that really needed it, never got it! Like, why in the 'ell would they spray it on the fuel pump ....yeah, at 214k miles, it appears to have original fuel pump ....good ole Bosch! Bosch seems to do it right when it comes to essential subsystems!
 

AndyBees

Top Post Dawg
Joined
May 27, 2003
Location
Southeast Kentucky
TDI
Silver 2003 Jetta TDI, Silver 2000 Jetta TDI (sold), '84 Vanagon with '02 ALH engine
Accel pedal

Andy what are you doing about the accel pedal? Are you using the all in one from the donor? If so, you may find the position is very uncomfortable. After a couple road trips I modified my TDI pedal to work with the stock vanagon pedal. Huge improvement. I cut the vanagon pedal flat and filled with jb weld. I then cut off the pedal from the TDI assembly and filled the side with jb weld. I then found some teflon tape that I applied to both where they meet. The tape is used in cabinet making. Gives a nice smooth surface. My original idea was to come up with a rod between the two, but this was easier and has worked out fine. mark

Mark, what year model is your Accel pedal from? I know you cut it off to mod for your application, but it looks different than mine!
 

markward

Veteran Member
Joined
Jul 5, 2007
Location
Loxahatchee, Florida
TDI
82 Vanagon and 2011 JSW
Andy, the 98 beetle had the two peice accel pedal. It had a seperate potentiometer connected to the pedal. I did not have a donor car, and opted to purchase a new pedal, that came into production in 99 at some point. The wiring has a subtle difference, but works fine as long as you keep it dry. I imagine the Jettas from 99 on also used the same pedal. All I cut off was the pad section of the pedal.

There is a thread on the Samba I pointed out above, and I believe he made a bracket that bolted to the floor that held his pedal assembly. I made a bracket and welded it to the firewall. I like the bolt in option better, but will still have the "awkward" feel that I used to have before adapting the vanagon pedal. I had a peice of 2x4 that I rested my heel on with the full pedal setup.
 

AndyBees

Top Post Dawg
Joined
May 27, 2003
Location
Southeast Kentucky
TDI
Silver 2003 Jetta TDI, Silver 2000 Jetta TDI (sold), '84 Vanagon with '02 ALH engine
Gees! Finally, I the dude finished the oil pan. I'm very satisfied. I will post photos later.

Unfortunately, on the way home from picking up the oil pan, apparently 5th gear went Kaput in my 2000 Jetta TDI. It just jumped out of 5th while I was traveling along at about 55 to 60 mph..........never done that before! It will not stay in 5th gear under load........coasting down hill is about it!
 

AndyBees

Top Post Dawg
Joined
May 27, 2003
Location
Southeast Kentucky
TDI
Silver 2003 Jetta TDI, Silver 2000 Jetta TDI (sold), '84 Vanagon with '02 ALH engine
Update:

Oil pan photos

This is a staight down view from the right side of the pan....toward the tranny is to the right.


This is an end view opposite the tranny end of the engine. Notice the bung for the oil fill tube.


A look inside. Notice the two baffles.


Another inside view looking from the Tranny end of the pan.


This is a right side view on the engine (sorry about the focus). You can see I did not bring the pan to a sharp angle on the right side.


This is a view looking down from the top right side.......AC compressor in the foreground!


This view is still on the right side showing engine block at top and the bung on the right lower for the oil drain plug.


This is a view of the bottom looking from the left side toward the right wheel. All those wires are from part of the harness .......just seeing how things will fit!


This is a view from the back center looking toward the front of the vehicle. Notice the left side of the pan is sort of round up.......that was sort of an oversight by the welder. However, as it turned out, the oil pump sprocket misses the pan bottom by about 1/4 inch. Also, the pan is within the "bubble" of level as well as the Vanagon sitting on the stands.


Remember this photo? ......see the oil pickup tube, well I need to change its orientation. Also, notice the clearance of the oil pump sprocket there on the left.


Gees! I hope to have the Intercooler pipes finished early next week. And, the dude that's been working on the engine mount brackets has left my work laying for several weeks ......... bummer!

EDIT: The pan did not warp due to the welding as I've heard some say! The method of aluminum welding the dude used allows the heat to dissipate rather fast without warping become an issue. Also, I had to eventually have a SS pan built. This one did crack along some of the welds.
 
Last edited:

markward

Veteran Member
Joined
Jul 5, 2007
Location
Loxahatchee, Florida
TDI
82 Vanagon and 2011 JSW
Step by Step, Inch by Inch. Looking good. I'd sure like to see someone make a cast pan for this application at some point. Mine weaps from one spot. Need to deal with it at some point. Are you going to replace the chain at this point? I think mine makes some noise, but can't be sure. My front crank seal weaps as well, so I may tackle the weap in the pan, front seal and the chain all at the same time. mark
 

AndyBees

Top Post Dawg
Joined
May 27, 2003
Location
Southeast Kentucky
TDI
Silver 2003 Jetta TDI, Silver 2000 Jetta TDI (sold), '84 Vanagon with '02 ALH engine
Step by Step, Inch by Inch. Looking good. I'd sure like to see someone make a cast pan for this application at some point. Mine weaps from one spot. Need to deal with it at some point. Are you going to replace the chain at this point? I think mine makes some noise, but can't be sure. My front crank seal weaps as well, so I may tackle the weap in the pan, front seal and the chain all at the same time. mark

Mark, my engine only has 129k miles on it, pretty much solidly verified! It belonged to MrGutWrench via Jimbote! So, I think all it's innards are in good shape!

My personal 2000 Jetta TDI has almost 294k miles on it with all original stuff in the engine. I do think I'll replace the lifters and oil pump chain assembly at 300k miles. I have a set of lifters with only 110k miles on them. They will be good to take it on to 500k miles!

Well, as you may have seen, I lost 5th gear in my Jetta a couple of days ago. I did a Thread in the A4 forums. I used the brass syncro ring, hub, dogs, slider, etc., from a gasser engine to get me by for now. It now stays in gear and seems okay. So, all this has caused me to lose about a day and half on my project.

My steel welder has just let me down! I hate to push him. So, I'm waiting for him to call me!:mad:
 

AndyBees

Top Post Dawg
Joined
May 27, 2003
Location
Southeast Kentucky
TDI
Silver 2003 Jetta TDI, Silver 2000 Jetta TDI (sold), '84 Vanagon with '02 ALH engine
Update:

Well, I finally "set" the Accelerator Pedal today! I've been scratching my head on this one off and on! I went ahead and tackled it this afternoon!

Although I have worked on the wiring harness, schematics, etc., off and on since March of 2009, I have recently made almost all the final modifications. The following photos are of the harness that contains the larger connector for the ECU.....items are identified. If you are familar with the ALH all this will make sense, otherwise you will be more or less lost!

Keep in mind, I've left a lot of "stuff" intact, AND, I am using the ALH TDI Cluster "in place" of the Vanagon Cluster, as well as the cruise control and a host of the various sensors, such as fuel, windshield washer level, brake fluid level, etc.....that stuff will show on the Cluster or will need resistors to turn it off!

Accelerator pedal first:

The EO base (modified of course) from the TDI vehicle was used in the mounting system. Follow the aluminum piece up to the bottom ...there you can see the OE base that the Pedal was originally bolted to......it was a task to jig-saw that piece off! The aluminum piece is about 22 inches long with several bends to make it work. Also, I had to off-set the pedal base a little to the left for correct alignment of the pedal.


A similar shot here. You can see that the opition to trim off the OE pedal and install the Vanagon OE pedal is still there!


Here you can see how the top part of the aluminum piece is secured to the air plenum. I believe larger screws will be necessary.


Now the wiring!
These photos are not the best......so, bear with me!

These are from left to right in the order of posting.
The connector on the far left top is for the Turbo pressure and temp sensor which is located on the exit side of the InterCooler (part of the wire is out of its cover). The next connector is the N239 ASV (anti-shutter valve), the next connector is for the EGR vacuum control (to cycle the EGR), and the next visible connector is the N75 for the Actuator on the Turbo.


In this photo, you can see the N75 again on the left, next is Glow Plug connector which connects to the other part of the Engine Harness, the two sets of wires at center bottom are for the MAF and the N79 PVC heat element and the three connectors at top right are for the Coolant heaters......yes, I am using them!


Moving on to the right, in this photo you can still see the three Coolant heater GP connectors, to their right is the Glow Plug relay & big red power wire, and the larger ECU plug connector bottom right......next photo please!...LOL


In this photo the GP Relay and ECU connector are still visible to the left side. Top center are the two receptacles for the Coolant heater relays (53s). To the right are the five colored connectors that all contain three or more wires that will be used in my application. Yes, those "extra" wires/circuits could be just snipped off. But, for now, I plan to leave them as they are.


The GP Relay, Coolant GP relays, colored connectors and ECU will all be mounted under the back seat of the Vanagon. The wiring harness needs "lengthened" just past the MAP wires to work properly. All the branches will be water proofed. All wiring in the tranny and engine bay area will be tripple warped!
 
Last edited:

AndyBees

Top Post Dawg
Joined
May 27, 2003
Location
Southeast Kentucky
TDI
Silver 2003 Jetta TDI, Silver 2000 Jetta TDI (sold), '84 Vanagon with '02 ALH engine
Short update:

Well, as I have said somewhere along the way, I try not to let a day go by without doing something on my project, even if it's only thinking about it.

Nope! I've not done much in the last week (tending to my 5th gear issue with my 2000 Jetta TDI among other things).

So, for those who have been hoping to see it at the Fest, I do apologize! It will not be there! In fact, the project is on hold until after Labor Day weekend!
 

AndyBees

Top Post Dawg
Joined
May 27, 2003
Location
Southeast Kentucky
TDI
Silver 2003 Jetta TDI, Silver 2000 Jetta TDI (sold), '84 Vanagon with '02 ALH engine
Well, guys, so far, the TDI Fest has been great ................hot too! We've met a lot of nice folks from all over with some real neat machines!

Hopefully, next week I can settle in and finish this project before winter!
 

Growler

Got Soot Vendor
Joined
Nov 24, 2003
Location
Millersport, Ohio
TDI
Schmutz, 2015 Golf Sportwagen DSG & Schnurren, 2001 Golf GL 2 door 5M
Andy, It was a Pleasure to meet you at the Banquet on Sunday.

best of luck with your conversion. Looking forward to seeing your van in action :)
 

AndyBees

Top Post Dawg
Joined
May 27, 2003
Location
Southeast Kentucky
TDI
Silver 2003 Jetta TDI, Silver 2000 Jetta TDI (sold), '84 Vanagon with '02 ALH engine
Meeting at the TDI Fest

Andy, It was a Pleasure to meet you at the Banquet on Sunday.

best of luck with your conversion. Looking forward to seeing your van in action :)
Yes, it was great meeting you as well! I had a great time at the Fest. It was great to put a face on so many club members!

In my opinion, Bruce (Paramedick) and his crew did a fantastic job putting things together!

The Vanagon project will be finished soon. However, I'm considering going a little beyond just a conversion! .....maybe a nice paint job too!:D
 

jjordan11

Veteran Member
Joined
Jan 5, 2008
Location
Lehi, UT
TDI
1988 Audi 80 quattro PD130, 1982 Westfalia TDI
Andy, I am a little jealous I wasn't able to make it. I haven't really been on the club too much lately. We are in the process of buying a short sale and it has us really involved. On a side note with the house it does have a shop so I should be able to catch up on some work on my projects.

Good work on your van, I look forward to more progress so I can glean some ideas from you :).

Jon
 

AndyBees

Top Post Dawg
Joined
May 27, 2003
Location
Southeast Kentucky
TDI
Silver 2003 Jetta TDI, Silver 2000 Jetta TDI (sold), '84 Vanagon with '02 ALH engine
Update

I haven't really done much of anything on the project in the last couple of weeks. However, I have been thumbing thru the wiring schematics, notes, etc., to freshen my memory as well as determine if there is anything that I may have missed or could be done differently.

I have been working under the back seat a little trying to determine the best set-up for the ECU, Relays, fuse panel(s), and wiring connectors ............sort of the sub-station.

Also, does anyone know if "venting" for cooling purposes is necessary for the ECU.....does it generate a lot of heat? What about "padding" for the ECU to absorb bounces, jolts, etc., while driving on back country roads? Any suggestions there will be appreciated.
 

AndyBees

Top Post Dawg
Joined
May 27, 2003
Location
Southeast Kentucky
TDI
Silver 2003 Jetta TDI, Silver 2000 Jetta TDI (sold), '84 Vanagon with '02 ALH engine
Under the back seat .............wiring central.! Gees! What a mess!


One more view


All those long Red Wires as well as most of the smaller wire bundles will be shortened once the exact location is determined!
 
Last edited:

markward

Veteran Member
Joined
Jul 5, 2007
Location
Loxahatchee, Florida
TDI
82 Vanagon and 2011 JSW
Andy, my ECU is mounted on end with the connector at the top. I made an aluminum bracket to hold it against the inner fender well behind the right tail light. Worked out ok so far. My power relays are mounted in the engine compartment at the front of it. mark
 

AndyBees

Top Post Dawg
Joined
May 27, 2003
Location
Southeast Kentucky
TDI
Silver 2003 Jetta TDI, Silver 2000 Jetta TDI (sold), '84 Vanagon with '02 ALH engine
Update:

Nope! I have not quit. I've done a few things since the TDI Fest. The Welder who has been working with me on the motor mounts, etc., finally come thru with the brackets. He cut metal brackets based on the proto type aluminum ones I prepared for him. So, as time permits, I've been working with those and hope to have them finished in a few days.

Photos will be posted.

I will be heading to Florida next week on a long awaited vacation! So, the first part of October will be lost as far as progress on this project!
 

jimbote

Certified Volkswagen Nut
Joined
Jul 10, 2006
Location
spiral arm, milky way (aka central NC)
TDI
Tacoma 4x4 converted to TDI
Andy...I mounted my ECM behind the glovebox on my tacoma....before I cleaned up my wiring the ecm was hanging by the harness in the passenger floor board...even after extended driving it never got hot to the touch...a little warm perhaps....and so far so good with it mounted in the stock tacoma ecm location...all tucked away under the dash behind the glovebox.... I know the newer PD ecms have cooling fins, perhaps they generate alot more heat?
 

jjordan11

Veteran Member
Joined
Jan 5, 2008
Location
Lehi, UT
TDI
1988 Audi 80 quattro PD130, 1982 Westfalia TDI
I don't think airflow or anything is imperative with mounting the ECM, if it was prone to getting warm/hot there would have been heat sinks built into the case as with the EDC16+ ECM's. As it is the PCB is kind of floating in the metallic housing. I have mine mounted beneath the rear seat without any problems.
 
Top