TDI Ranger Build

Growler

Got Soot Vendor
Joined
Nov 24, 2003
Location
Millersport, Ohio
TDI
Schmutz, 2015 Golf Sportwagen DSG & Schnurren, 2001 Golf GL 2 door 5M
I wasnt talking about the tdc marks on the tin covers. never used those myself. I was talking about the small DOTS on the crank gear and lining those up with the rib on the front frank seal housing. these are the ones that MOGolf showed me about and that he uses to get to TDC on most of his TB jobs. After the serp belt & balancer pulley are removed.

and Greengeeker, nice TDC mark. should be easy to spot if it doesnt get coated in clutch dust over time.
 

greengeeker

Vendor
Joined
Feb 8, 2006
Location
Cambridge, MN
TDI
2002 Jetta GLS
I wasnt talking about the tdc marks on the tin covers. never used those myself. I was talking about the small DOTS on the crank gear and lining those up with the rib on the front frank seal housing. these are the ones that MOGolf showed me about and that he uses to get to TDC on most of his TB jobs. After the serp belt & balancer pulley are removed.
and Greengeeker, nice TDC mark. should be easy to spot if it doesnt get coated in clutch dust over time.
Thanks Aaron.
I'm looking at the sprocket now and that seems like it would work. No stack up but not as accurate as a flywheel mark IMO.
First coat of primer just went on the block. I have a sweet tool that preps the block (save cleaning) in literally 10min.:D
 

Ski in NC

Top Post Dawg
Joined
Jul 7, 2008
Location
Wilmington, NC USA
TDI
2001 Jetta ALH 5sp stock
Might want to throw an new ring gear on that fw. Teeth look a bit gnarly.

Nice job on the adapter!

Where did you get the bolthole, starter, etc dimensions? Measure or found elsewhere?
 

greengeeker

Vendor
Joined
Feb 8, 2006
Location
Cambridge, MN
TDI
2002 Jetta GLS
I have a sweet tool that preps the block (save cleaning) in literally 10min.:D
So this is where I started:


and a close up of the crustiness:


Here is the needle scaler I bought from Northern Tool for $35 to get in the nooks and crannies of the block.


In 60 seconds (I'm not kidding) I've turned the above crusty pic into this:


After some cleaning and three coats of engine primer I'm ready for paint:


Tomorrow it will get a color to counteract fouckhest's :)
 

greengeeker

Vendor
Joined
Feb 8, 2006
Location
Cambridge, MN
TDI
2002 Jetta GLS
As soon as I had the engine bolted to the transmission I threw the combination into the truck to see how things were shaping up for firewall clearance and mounts. Previous swappers have warned that firewall clearance can be a deal breaker and should be adjusted to avoid complications down the road.

Here is where everything sits with the transmission bolted to its mount:


And as you may have guessed it is sitting too close to the firewall even without the vacuum pump installed. I probably could have pulled out the coolant nipped and put a 90 in there but I really didn't want to go down the road of sourcing a vacuum pump and fabbing a delete plate.


To get an idea how far forward I needed to shift the eng/tranny I simply slid the head forward on teh block until I was happy with the clearance between the vacuum pump and the firewall. The picture shown below is 2" foward.


The 2" looks like the ticket but it really started to shine when I looked closer at the mounts and accessory clearance to the steering rack:


On to mount fabrication.
 

Growler

Got Soot Vendor
Joined
Nov 24, 2003
Location
Millersport, Ohio
TDI
Schmutz, 2015 Golf Sportwagen DSG & Schnurren, 2001 Golf GL 2 door 5M
awesome work.. I saw another silver Eurovan in there... Lucky you & me eh? Love our van.

that needle scaler looked pretty awesome.. good job on block cleanup.
 

greengeeker

Vendor
Joined
Feb 8, 2006
Location
Cambridge, MN
TDI
2002 Jetta GLS
Thanks guys.

We absolutely love our Eurovan Aaron. I only wish my wife would let me slip an exhaust on there so I can hear some more of the vr6 sweetness. :D
 

greengeeker

Vendor
Joined
Feb 8, 2006
Location
Cambridge, MN
TDI
2002 Jetta GLS
Mount Fabrication

Bear with me here - I can't seem to access photobucket so I'm going to wing it with the file names and see if it works.

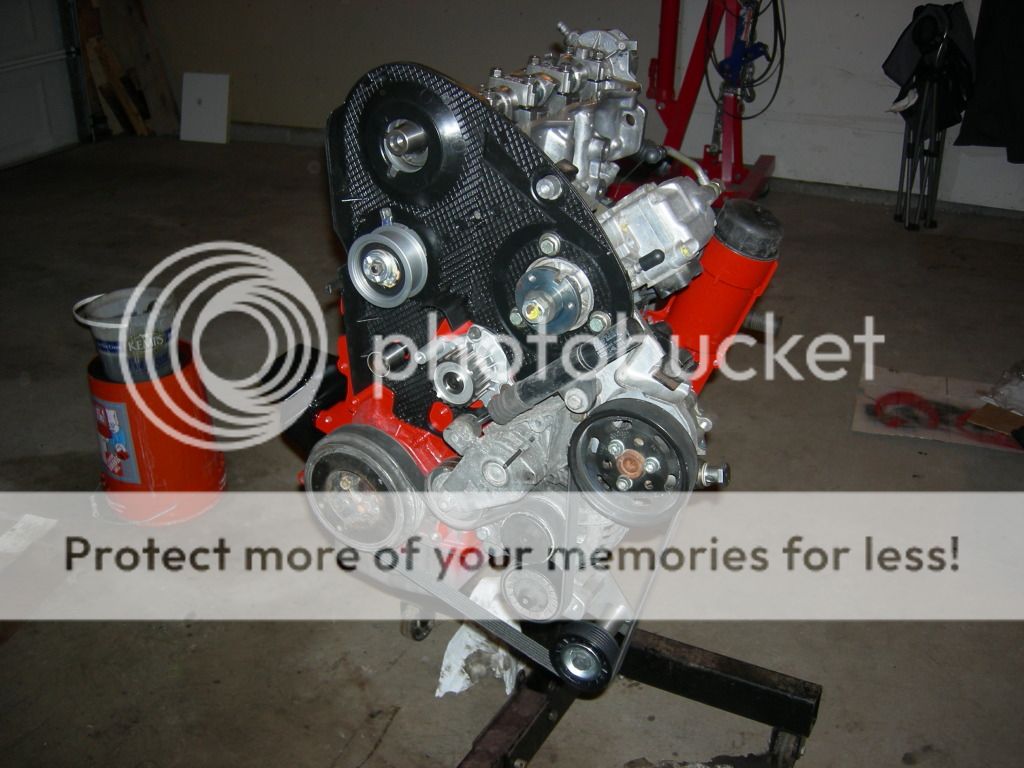
I needed to identify which bosses on the block I could use for my mounts. I knew I wanted to use the ones closest to the existing ranger mounts but I needed to verify the mounts wouldn't interfer with any component on the engine.

Passenger side mount looks like I have a bunch of options.


From my picture posted earlier of the driver's side it seems my options are pretty slim. Looks like I have to use the only three available.


Pull out the used Cheerios boxes and go to town... (I don't seem to have pictures of the passenger mount in place but you get the idea)


I took my paper templates and flatened them out to trace onto some 6 gauge steel (.180") and with some help from a buddy at work on the press break and I now have something to work with. Driver's side on the left, passenger on the right. I really wanted to make these one piece but I didn't have an accurate mating of the two pieces of my mounts.


Here are the two separate parts of the mounts bolted to the block and the block to the ranger mount:


And here they are both bolted on so I can mark a cut line on the lower mount portion:


Cut and tacked together:


I had to ditch my original mount design for the driver's side due to bolt access. I could have made it work but I would have needed to shorten the bolts significantly just to get them in place. Even then tool access would have sucked. Here is what I ended up doing:


And here's the end result. I was so pumped to get the mounts completed! Clearance to the steering rack is perfect. I could have dropped the engine by 1.5" but I really wanted to avoid notching the oil pan. Even if I did notch it I bet I could only gain another 1/2" due to the oil pump being right there...anybody know how much this is exactly?


greengeeker

Vendor
Joined
Feb 8, 2006
Location
Cambridge, MN
TDI
2002 Jetta GLS
Hard water pipe modification

The M5OD-R1 transmission is about 1" taller than the VW transmissions and interfers with the hard pipe that crosses the back of the block/head.


The fix is easy to do but requires you to create a new mount for the water pipe. You MUST have the pipe bolted to the head and water neck when you do this so you get the orientation and angle correct.


I don't seem to have an intermediate pictures but I cut off the end of the pipe and welded it to the end of the section of pipe I'm going to keep:


I'll just make it over to the heater core with a longer length of hose.
 

Growler

Got Soot Vendor
Joined
Nov 24, 2003
Location
Millersport, Ohio
TDI
Schmutz, 2015 Golf Sportwagen DSG & Schnurren, 2001 Golf GL 2 door 5M
Excellent work on the engine mounts and the coolant pipe redesign.

however I am a little concerned about the design of the passenger side mount from what you have shown so far.

did you ever add any gussets or box it in anywhere? also, why not use rubber mounts between the engine and frame? (or did I miss them?)

you and I both know that the TDI engine isnt the smoothest running engine and I was worried about having too many vibrations in the cabin from the hard mounted engine.

the AC delete looks pretty good, but I am concerned about the length of the cantilevered pulley on the bottom there. Might be a good idea to put a couple of thick washers on either side of that plate that the pulley post is bolted to to help prevent deflection of that plate. or perhaps weld a thick washer to the back side to beef it up and reduce the chances of deflection due to the long cantilever with the forces involved in that setup.

any chance of getting a threaded bolt thru the boss that holds the pully to push against the casting that is right there? would help support it as well.

sorry, I am a mechanical designer and I see things like this a potential issues.

Aaron
 

curtis75

Well-known member
Joined
May 16, 2012
Location
London, ON
TDI
none, yet
The rubber mounts are in there. They have a steel shell around them. I agree that the passenger mount could be improved slightly, although not a bad start. It would be nice to take a couple of the 90s out of the bracket and make it more of a straight shot to the engine, gusseting would also help. When we design brackets like this at work, we are also required to make sure they don't hold water for corrosion reasons, just another thing to watch for.

Great work so far, keep it up
 

greengeeker

Vendor
Joined
Feb 8, 2006
Location
Cambridge, MN
TDI
2002 Jetta GLS
One of the pictures I couldn't upload last night showed the gusset I have on the passenger side mount. The dip in that mount is on purpose since I plan to mount my a/c compressor on that side and I'd like to tuck it as low as possible so it doesn't interfere with my turbo piping.

I just got the last part of the a/c delete from Jon last night so I didn't have time to add in my planned gusseting. I mainly wanted to verify the position and squareness of the pulley before I go welding everything together.
 
Last edited:

curtis75

Well-known member
Joined
May 16, 2012
Location
London, ON
TDI
none, yet
I wondered if that dip was for a reason. In that case, it looks awesome. I'm sure I'll be revisiting this in a couple weeks when I get around to doing this.
 

greengeeker

Vendor
Joined
Feb 8, 2006
Location
Cambridge, MN
TDI
2002 Jetta GLS
OK peeps. I'm ready for my design review:

In order to do this sort of a/c you first have to hack up your accessory bracket. This wasn't an issue for me since I had to do it to clear my steering rack anyway. Honestly I didn't realize i could use this new "boss" until I tried to attach my bracket elsewhere. :eek:


Here's the tacked up, reinforced bracket:


greengeeker

Vendor
Joined
Feb 8, 2006
Location
Cambridge, MN
TDI
2002 Jetta GLS
I also got my flywheel resurfaced and my driveshaft shortened:


Used shaft from a 98+ extended cab, 2wd, 5spd Ranger: $45
Shortened, balanced, new UV joints, cleaned up: $120
 

greengeeker

Vendor
Joined
Feb 8, 2006
Location
Cambridge, MN
TDI
2002 Jetta GLS
Nope. Everything will still be properly oiled and the pickup for the oil pump will still stay submerged in the oil. I do have to mark a new full oil mark on the dipstick though.:D
 

Lone Ranger

Veteran Member
Joined
Jul 13, 2007
Location
Winnipeg MB
TDI
TDI Ranger
Looks good green! The only thing I can see that I did different is when i had the tran and motor bolted together i put the trans on the original mount and built around that. Shortened driveshaft means you have the motor/trans even further back than original? I know in my setup if I did that the alternator would be hitting the mount on the driver side, which i already moved back. I have pics of all what I did and plan to make a website, but I'm havin too much fun driving the truck. lol.

ps. you lucky sob for having access to a CMM and adequate cutting machines. Mine was all done by a caliper, trial/error and massive swear words!
 

Lone Ranger

Veteran Member
Joined
Jul 13, 2007
Location
Winnipeg MB
TDI
TDI Ranger
He moved it forward 2". That driveshaft is from an extended cab, and his is a regular cab.

Ahh ok, yes I see that now that I wentback and looked it over again. Where I put mine, the vacuum pump was ok, the main line off the pump does brush against the fire wall a hair but not enough for me to be concerned.
As for the coolant passage out the back you can get a flange from an automatic that dosent have the one going straight back.

http://www.metalmanparts.com/product.sc?productId=278

I ended up just teeing into the line going back to the rad and ran that over to my heater core.
 

chudzikb

Veteran Member
Joined
Sep 28, 1999
Location
Lancaster, PA, USA
TDI
05.5 Jetta 03 Golf 2 door
So, what I want to know is...when I can drop off my 06 Ranger and have you drop in an ALH motor for me? No way, no how, could I ever do what you are doing, that's some mad skills. Well done...
 
Top