There are a bunch of threads talking about replacing the serpentine belt tensioner and idler pulley but mostly without pictures so I thought I'd add some.
There was a noticeable rough sound from the passenger side of the engine compartment after my car met a large pothole. Taking off the timing belt and spinning the various pulleys, the idler pulley had a noticeable grittiness that didn't belong there. I though I'd replace the tensioner too at 127K miles while I was there.
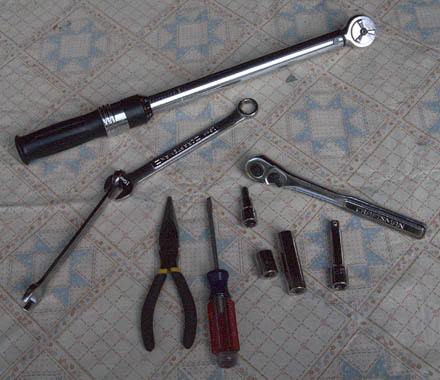
The tools you will need:
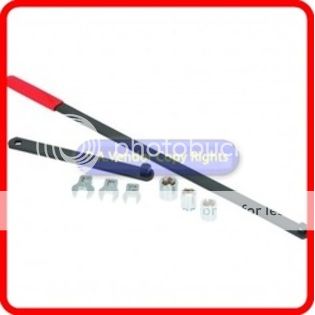
16 mm box wrench (notice two wrenches hooked together)
13 mm socket (may need regular and deep)
extension
6 mm hex bit (the shorter the better)
torque wrench
ratchet
flathead screwdriver
pliers
tools for removing skid plate/belly pan and side skirt
**** Torque value to remember - 18 ft-lbs ****
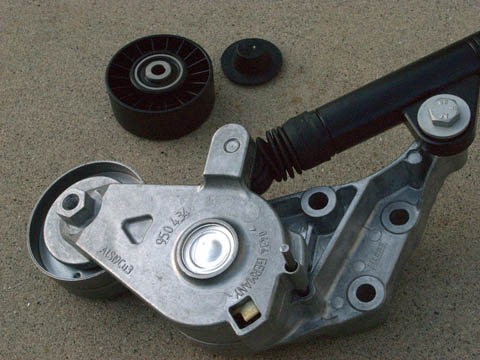
Here is the new tensioner and idler pulley. It even comes with a new hat for the pulley!
1. Put the car on ramps, chock wheels, remove the skid plate/belly pan and passenger side side skirt. Open the hood (do I need to say this?).
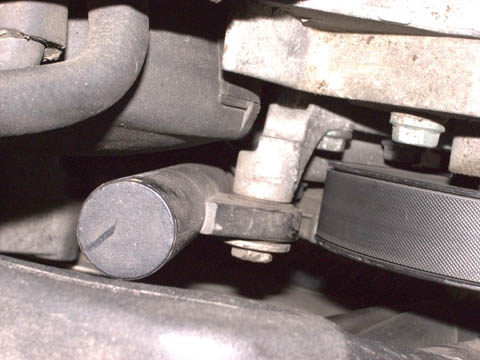
2. Here is the tensioner from above and where the serpentine belt runs over the PS pulley.
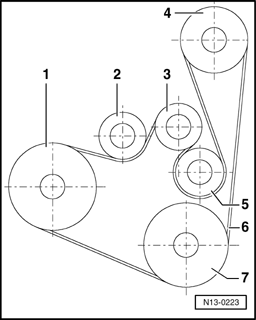
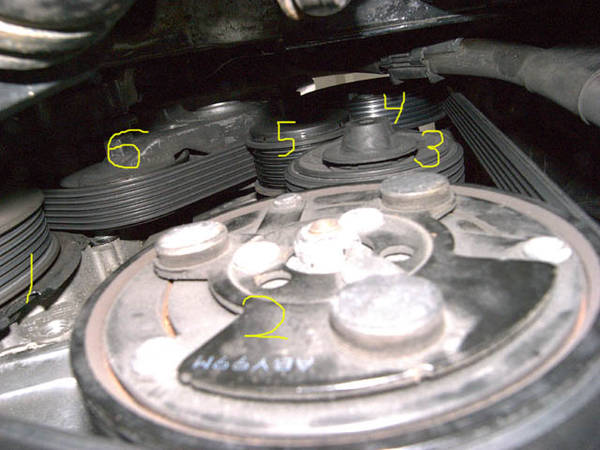
3. The tour from below - take note of the routing of the belt:
(1) crankshaft pulley
(2) AC pulley - may want to check tightness of 14 mm nut while there
(3) idler pulley
(4) power steering pump pulley
(5) alternator pulley
(6) tensioner and pulley
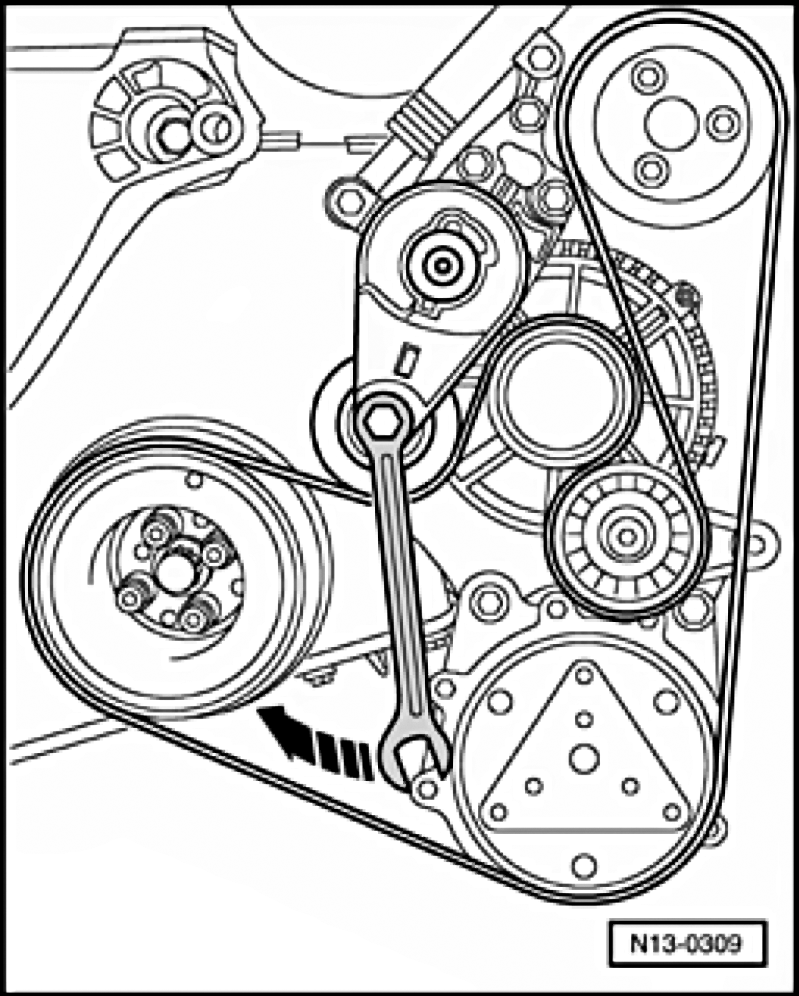
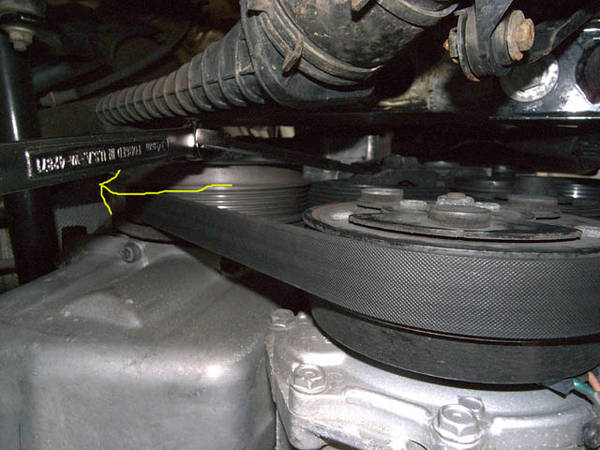
4. Remove the serpentine belt by placing the 16 mm box wrench onto the "nut" on the tensioner and pushing back towards the firewall (the direction of the arrow) to relieve the tension and slip the belt off the pulleys. I used a second wrench on the end of the first for extra leverage and to reduce the chance of pinching myself. (If you're only replacing the serpentine belt, just reverse the steps from here and you're done.)
5. Pop the "hat" off the idler pulley with a screwdriver and loosen the bolt with a 6 mm hex wrench. If you use a socketed bit like I did, use the shortest one you have since clearance is tight. I had to loosen with the bit, remove the bit, then take the screw out by hand, then remove the pulley.
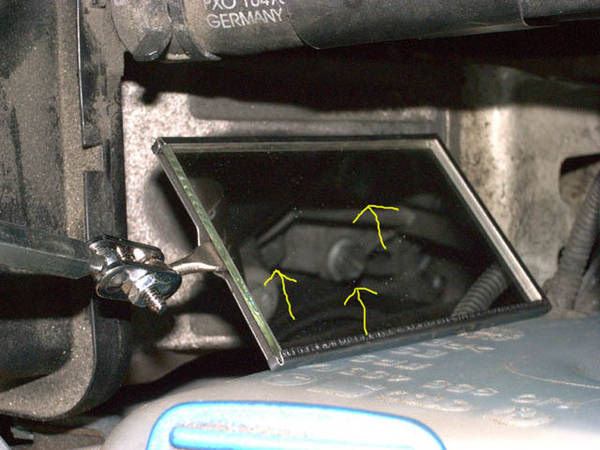
6. Remove the 3x 13 mm bolts holding the tensioner (arrows in photo). It may help to remove the upper hose leading to the EGR to give yourself some wiggle room.
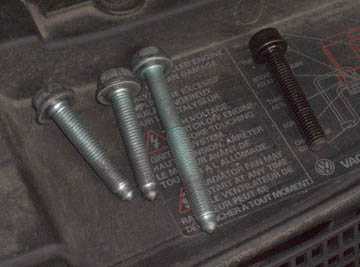
7. Here are the 3 bolts for the tensioner and the bolt for the idler pulley. Note that one of the tensioner bolts is longer. That goes through the hole in the thicker part of the casting that you will see.
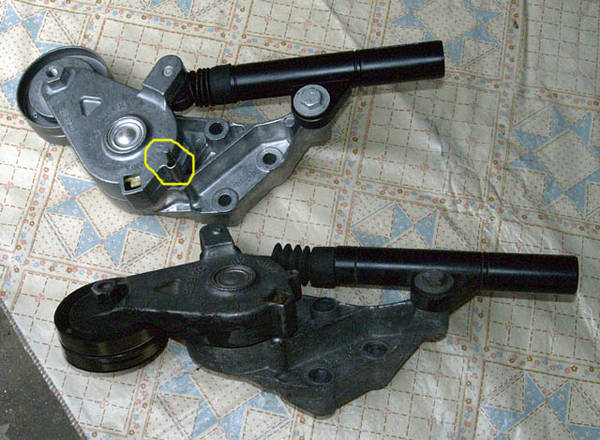
8. Here are the new and old tensioners. The new one is folded like it is probably to reduce shipping size. You will need to remove the pin (yellow circle) at some point so that it will actually work. I recommend doing this before trying to put it in. Put your box wrench on the nut and set that end against the ground, push down a little, and pull the pin out with pliers - easier done than described.
9. Reinstall in reverse order. No pictures here because it looks just like before except with newer shiny parts. Torque the tensioner bolts to 18 ft-lbs. The idler pulley bolt is also 18 ft-lbs but I had trouble getting a torque wrench in there so tightened it to what felt tight enough. I'll recheck the tightness later down to road to make sure it hasn't loosened. Remember to put the new hat back over the idler pulley to keep things clean, to. When putting the belt back on, you'll notice the new tensioner will be stiffer than the old one.
10. Reinstall side skirt and skid plate/belly pan.
The postmortem showed that the tensioner pulley was freewheeling much more than the new one. The old idler pulley was definitely due for replacement, too. It sounded gritty spinning in hand and had noticeable side-to-side play and it rattled loudly if you shook it gently.
There was a noticeable rough sound from the passenger side of the engine compartment after my car met a large pothole. Taking off the timing belt and spinning the various pulleys, the idler pulley had a noticeable grittiness that didn't belong there. I though I'd replace the tensioner too at 127K miles while I was there.
The tools you will need:
16 mm box wrench (notice two wrenches hooked together)
13 mm socket (may need regular and deep)
extension
6 mm hex bit (the shorter the better)
torque wrench
ratchet
flathead screwdriver
pliers
tools for removing skid plate/belly pan and side skirt
**** Torque value to remember - 18 ft-lbs ****
Here is the new tensioner and idler pulley. It even comes with a new hat for the pulley!
1. Put the car on ramps, chock wheels, remove the skid plate/belly pan and passenger side side skirt. Open the hood (do I need to say this?).
2. Here is the tensioner from above and where the serpentine belt runs over the PS pulley.
3. The tour from below - take note of the routing of the belt:
(1) crankshaft pulley
(2) AC pulley - may want to check tightness of 14 mm nut while there
(3) idler pulley
(4) power steering pump pulley
(5) alternator pulley
(6) tensioner and pulley
4. Remove the serpentine belt by placing the 16 mm box wrench onto the "nut" on the tensioner and pushing back towards the firewall (the direction of the arrow) to relieve the tension and slip the belt off the pulleys. I used a second wrench on the end of the first for extra leverage and to reduce the chance of pinching myself. (If you're only replacing the serpentine belt, just reverse the steps from here and you're done.)
5. Pop the "hat" off the idler pulley with a screwdriver and loosen the bolt with a 6 mm hex wrench. If you use a socketed bit like I did, use the shortest one you have since clearance is tight. I had to loosen with the bit, remove the bit, then take the screw out by hand, then remove the pulley.
6. Remove the 3x 13 mm bolts holding the tensioner (arrows in photo). It may help to remove the upper hose leading to the EGR to give yourself some wiggle room.
7. Here are the 3 bolts for the tensioner and the bolt for the idler pulley. Note that one of the tensioner bolts is longer. That goes through the hole in the thicker part of the casting that you will see.
8. Here are the new and old tensioners. The new one is folded like it is probably to reduce shipping size. You will need to remove the pin (yellow circle) at some point so that it will actually work. I recommend doing this before trying to put it in. Put your box wrench on the nut and set that end against the ground, push down a little, and pull the pin out with pliers - easier done than described.
9. Reinstall in reverse order. No pictures here because it looks just like before except with newer shiny parts. Torque the tensioner bolts to 18 ft-lbs. The idler pulley bolt is also 18 ft-lbs but I had trouble getting a torque wrench in there so tightened it to what felt tight enough. I'll recheck the tightness later down to road to make sure it hasn't loosened. Remember to put the new hat back over the idler pulley to keep things clean, to. When putting the belt back on, you'll notice the new tensioner will be stiffer than the old one.
10. Reinstall side skirt and skid plate/belly pan.
The postmortem showed that the tensioner pulley was freewheeling much more than the new one. The old idler pulley was definitely due for replacement, too. It sounded gritty spinning in hand and had noticeable side-to-side play and it rattled loudly if you shook it gently.
")