
frugality
Top Post Dawg
There doesn't appear to be a thermostat change how-to, so I took some pics as I changed mine. This was on my A4 Golf, which is probably identical to the Jetta, and probably pretty similar to a Beetle.
Coolant temperature issues:
If you are experiencing coolant temperature variation, it is likely that the coolant temperature sensor is the problem. They are more prone to going bad than are the thermostats. The needle will be low, and will bobble around a bit. I had this happen once, and replacing the coolant temperature sensor fixed the problem. A couple of years later, my coolant temperature was reading low, just within the next hashmark down from 190 degrees, so I thought my new coolant temperature sensor went bad already. I replaced it again and it didn't fix the problem. I replaced the thermostat, and now the gage pegs right to 190 and hold steady there, so it was indeed a bad thermostat this time. When the temperature sensor went bad, it bobbled and varied more. When the thermostat went bad, it was more consistent, staying in a position that was about one hashmark low.
Anyway, without further ado, on to the How-To:
Supplies:
New thermostat. (Part # 044 121 113)
New O-ring. (Part # 038 121 119 B)
New thermostat flange. (Part # 038 121 121)
50/50 mix of G12 (pink) coolant and distilled water.
Catch pan, rags, beer, etc.
Tools:
10mm socket for engine cover nuts.
T-25 and maybe T-30 torx drivers or bits for belly pan.
6mm socket for lower radiator hose clamp at flange.
5mm hex bit (allen bit) on a 6" ratchet extension for flange bolts.
Torque wrench.
* Remove engine cover.
* Jack up the front of your car, or put it on ramps (set your parking brake!), and remove belly pan. (T-25 torx screws, and maybe a T-30 or two...)
* Remove cap from coolant reservoir, to allow air in as the coolant drains.
* Open drain valve at lower left corner of radiator, on the lower radiator hose. It rotates maybe 30-45 degrees counterclockwise, then you pull the whole knob outward to open it up.
This is all the instructions the Bentley manual gives. I only got about 1/2-gallon of coolant out. I expected to get more than that, but in calling r90sKirk, that's about right. A bunch more drained out when I removed the thermostat, and this was impossible to catch, and also got grunge in it from running down the engine, so have some spare 50/50 mix of G12 (pink) coolant and distilled water handy.
I still have my side skirt attached, and it's in the way. I used a funnel to direct the coolant to a catch pan. A piece of rubber hose would do the trick, too, but I didn't have the right size handy.
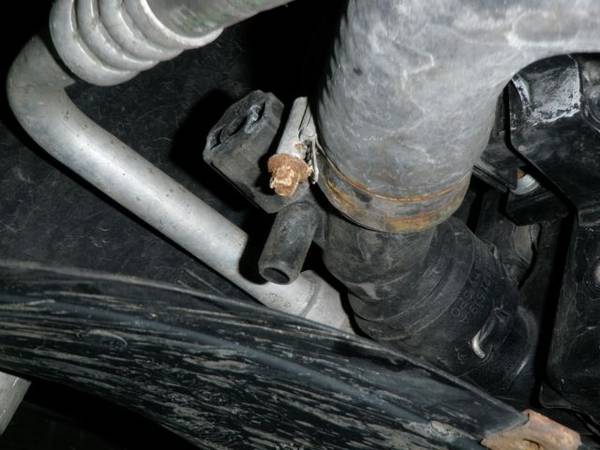
* Remove clamp from the lower radiator hose at the thermostat flange. This is just underneath the fuel injection pump:
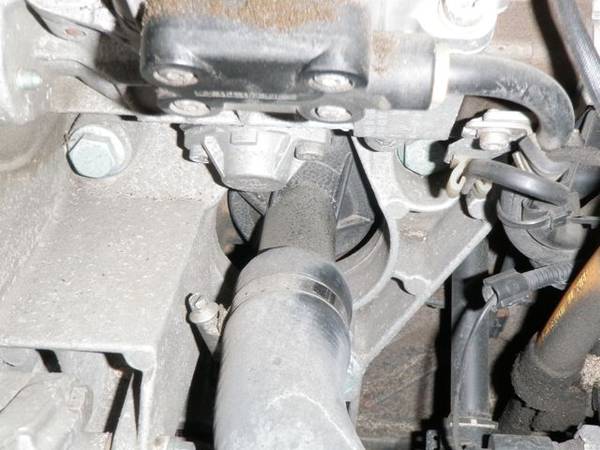
* Remove the 2 bolts holding the thermostat flange to the block, 5mm allen bit on about a 6-inch ratchet extension.
* Remove thermostat flange. The Bentley says to rotate the flange 90 degrees counterclockwise, but this is impossible given the diamond-shaped opening in the bracket that flange passes through. The only thing to do is to pull it straight back, which will damage the flange. (See picture at the end of this how-to.) You should now have this:
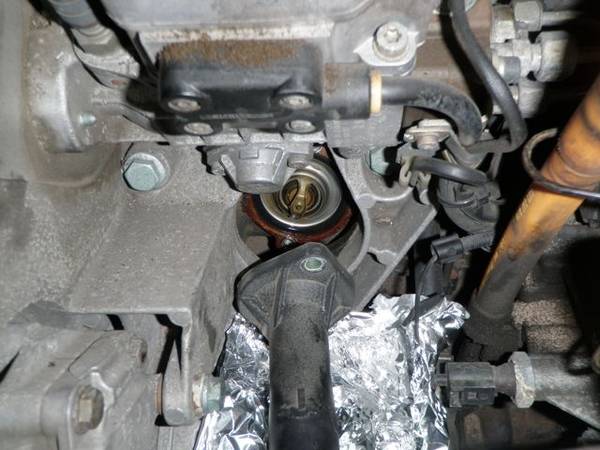
* I covered the alternator with aluminum foil to prevent coolant from spilling out on it.
* Remove O-ring. I used a small, curved pick. Coolant will start to leak out, unless someone has any recommendations for draining more coolant out of the block from some location other than the lower radiator drain. Based on how much coolant I had to add later to re-fill it, it seems I dumped another 1/2-gallon, or slightly more. If you only pull back a small bit of the O-ring, the coolant will run out in a more controlled manner, and not gush out. I was only able to catch about half of it in my oil change pan, because it dribbled everywhere down below.
* Remove thermostat. It should now look like this:
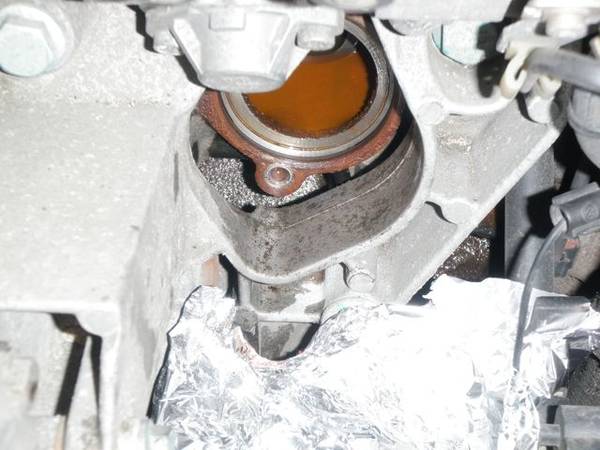
* Clean mating surface on the block.
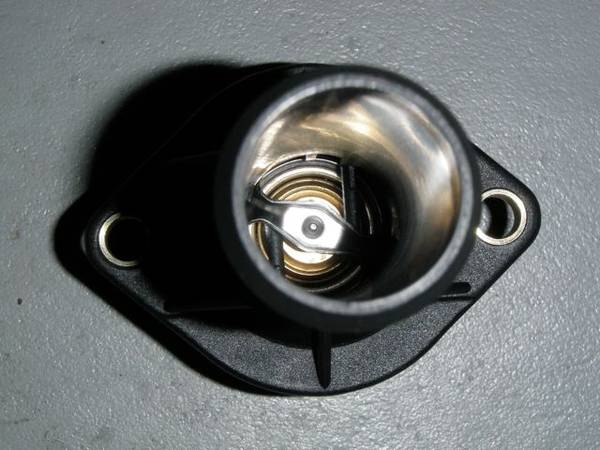
* Install new O-ring and thermostat onto a new coolant flange. To aid installation, the thermostat holds onto 2 pins that are molded into the flange. Looking down the flange:
*** If you are re-using your old flange and have broken the pins/tabs, all is not lost. Refer to this excellent post by 'cattlerepairman':
http://forums.tdiclub.com/showthread.php?t=148452
Orientation of the thermostat in the block is not important. It doesn't have to be lined up with the tabs, they are just there as an assembly aid.
* Install thermostat/O-ring/flange assembly into the engine block.
* Reinstall bolts and torque to 15 Nm (11 ft.-lb.)
* Reattach lower radiator hose to new flange and tighten clamp.
* Double-check that your radiator drain valve is closed.
* Fill with new 50/50 coolant. I did this just through the expansion tank, and was just patient. Some have said that you can hook up a MityVac and draw the air out to help fill the system. Someone elsewhere showed a method of taking the upper radiator hose connection loose near the battery and pouring coolant into both hoses -- into the block and into the radiator. Fill the expansion tank so that it's at the proper level, and reinstall cap.
* Start car and check for leaks. Watch the expansion tank and add coolant if the coolant level drops.
* If everything seems O.K., reinstall belly pan and engine cover. Pat self on back....you have avoided the dealer once again.")
Addendum #1:
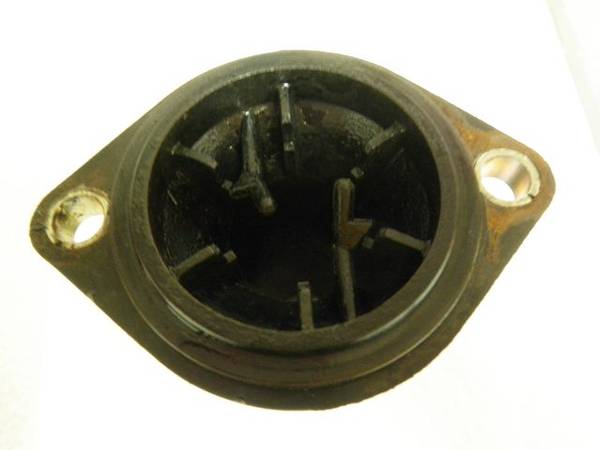
This is what happens when you pull the old flange off. The original O-ring is pretty well stuck in the block, and holds the thermostat in the block. When you pull the flange, it breaks the 2 thermostat-holder pins.
Addendum #2:
This is a comparison between the OE thermostat ($66 at my local dealer) and an aftermarket thermostat from one of our trusted vendors ($19). The aftermarket thermostat will not attach to the flange. The pointy end is not big enough to catch on the 2 pins. I recommend going with the original VW thermostat. The aftermarket one did come with a new O-ring. The VW one did not, and has to be purchased separately.

The 2 pins of the flange are supposed to engage within the 'arch' on the top of the thermostat. There is no provision for this on the aftermarket thermostat, however. Also, as you can see there are some other differences in construction between the two thermostats.
Coolant temperature issues:
If you are experiencing coolant temperature variation, it is likely that the coolant temperature sensor is the problem. They are more prone to going bad than are the thermostats. The needle will be low, and will bobble around a bit. I had this happen once, and replacing the coolant temperature sensor fixed the problem. A couple of years later, my coolant temperature was reading low, just within the next hashmark down from 190 degrees, so I thought my new coolant temperature sensor went bad already. I replaced it again and it didn't fix the problem. I replaced the thermostat, and now the gage pegs right to 190 and hold steady there, so it was indeed a bad thermostat this time. When the temperature sensor went bad, it bobbled and varied more. When the thermostat went bad, it was more consistent, staying in a position that was about one hashmark low.
Anyway, without further ado, on to the How-To:
Supplies:
New thermostat. (Part # 044 121 113)
New O-ring. (Part # 038 121 119 B)
New thermostat flange. (Part # 038 121 121)
50/50 mix of G12 (pink) coolant and distilled water.
Catch pan, rags, beer, etc.
Tools:
10mm socket for engine cover nuts.
T-25 and maybe T-30 torx drivers or bits for belly pan.
6mm socket for lower radiator hose clamp at flange.
5mm hex bit (allen bit) on a 6" ratchet extension for flange bolts.
Torque wrench.
* Remove engine cover.
* Jack up the front of your car, or put it on ramps (set your parking brake!), and remove belly pan. (T-25 torx screws, and maybe a T-30 or two...)
* Remove cap from coolant reservoir, to allow air in as the coolant drains.
* Open drain valve at lower left corner of radiator, on the lower radiator hose. It rotates maybe 30-45 degrees counterclockwise, then you pull the whole knob outward to open it up.
This is all the instructions the Bentley manual gives. I only got about 1/2-gallon of coolant out. I expected to get more than that, but in calling r90sKirk, that's about right. A bunch more drained out when I removed the thermostat, and this was impossible to catch, and also got grunge in it from running down the engine, so have some spare 50/50 mix of G12 (pink) coolant and distilled water handy.
I still have my side skirt attached, and it's in the way. I used a funnel to direct the coolant to a catch pan. A piece of rubber hose would do the trick, too, but I didn't have the right size handy.
* Remove clamp from the lower radiator hose at the thermostat flange. This is just underneath the fuel injection pump:
* Remove the 2 bolts holding the thermostat flange to the block, 5mm allen bit on about a 6-inch ratchet extension.
* Remove thermostat flange. The Bentley says to rotate the flange 90 degrees counterclockwise, but this is impossible given the diamond-shaped opening in the bracket that flange passes through. The only thing to do is to pull it straight back, which will damage the flange. (See picture at the end of this how-to.) You should now have this:
* I covered the alternator with aluminum foil to prevent coolant from spilling out on it.
* Remove O-ring. I used a small, curved pick. Coolant will start to leak out, unless someone has any recommendations for draining more coolant out of the block from some location other than the lower radiator drain. Based on how much coolant I had to add later to re-fill it, it seems I dumped another 1/2-gallon, or slightly more. If you only pull back a small bit of the O-ring, the coolant will run out in a more controlled manner, and not gush out. I was only able to catch about half of it in my oil change pan, because it dribbled everywhere down below.
* Remove thermostat. It should now look like this:
* Clean mating surface on the block.
* Install new O-ring and thermostat onto a new coolant flange. To aid installation, the thermostat holds onto 2 pins that are molded into the flange. Looking down the flange:
*** If you are re-using your old flange and have broken the pins/tabs, all is not lost. Refer to this excellent post by 'cattlerepairman':
http://forums.tdiclub.com/showthread.php?t=148452
Orientation of the thermostat in the block is not important. It doesn't have to be lined up with the tabs, they are just there as an assembly aid.
* Install thermostat/O-ring/flange assembly into the engine block.
* Reinstall bolts and torque to 15 Nm (11 ft.-lb.)
* Reattach lower radiator hose to new flange and tighten clamp.
* Double-check that your radiator drain valve is closed.
* Fill with new 50/50 coolant. I did this just through the expansion tank, and was just patient. Some have said that you can hook up a MityVac and draw the air out to help fill the system. Someone elsewhere showed a method of taking the upper radiator hose connection loose near the battery and pouring coolant into both hoses -- into the block and into the radiator. Fill the expansion tank so that it's at the proper level, and reinstall cap.
* Start car and check for leaks. Watch the expansion tank and add coolant if the coolant level drops.
* If everything seems O.K., reinstall belly pan and engine cover. Pat self on back....you have avoided the dealer once again.
Addendum #1:
This is what happens when you pull the old flange off. The original O-ring is pretty well stuck in the block, and holds the thermostat in the block. When you pull the flange, it breaks the 2 thermostat-holder pins.
Addendum #2:
This is a comparison between the OE thermostat ($66 at my local dealer) and an aftermarket thermostat from one of our trusted vendors ($19). The aftermarket thermostat will not attach to the flange. The pointy end is not big enough to catch on the 2 pins. I recommend going with the original VW thermostat. The aftermarket one did come with a new O-ring. The VW one did not, and has to be purchased separately.
The 2 pins of the flange are supposed to engage within the 'arch' on the top of the thermostat. There is no provision for this on the aftermarket thermostat, however. Also, as you can see there are some other differences in construction between the two thermostats.
Last edited: